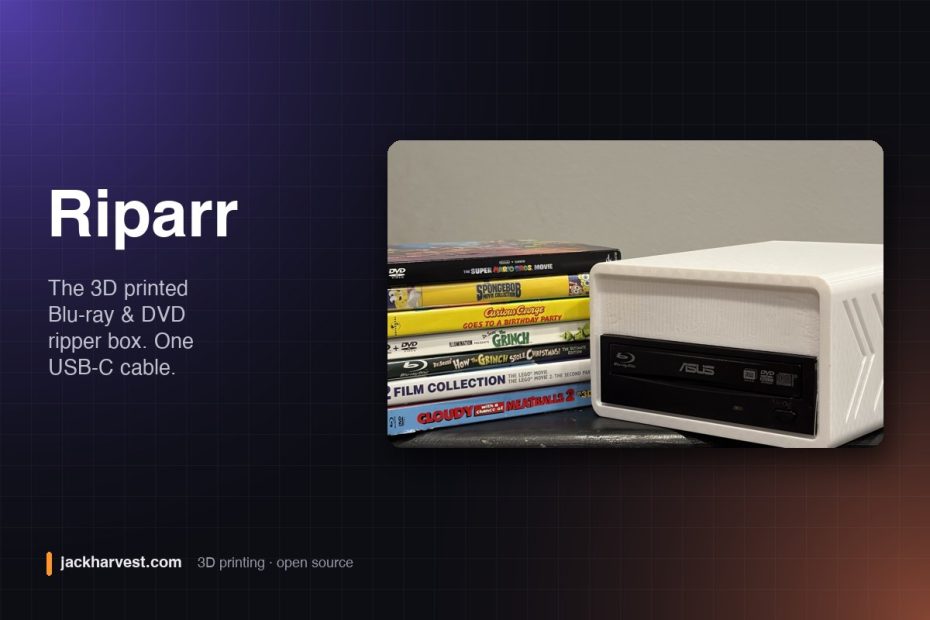
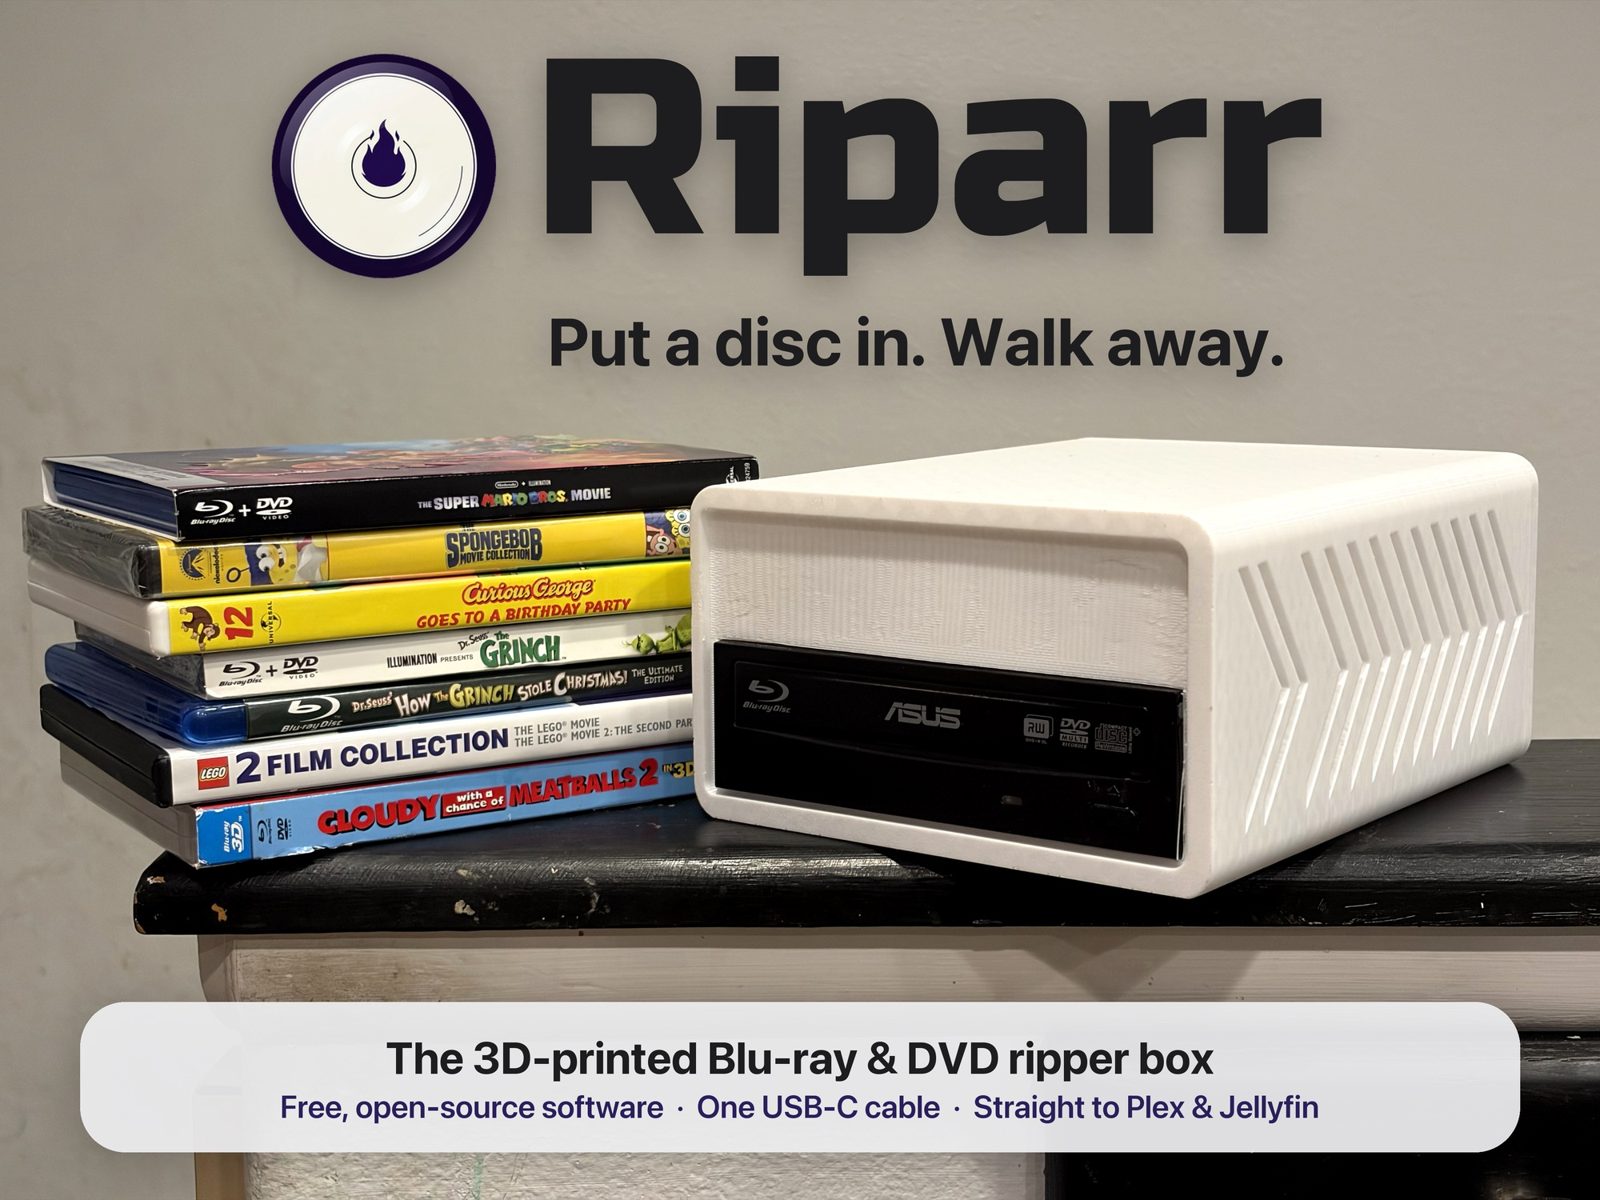
Sonarr does your TV. Radarr does your films. Nobody bothered with the shelf of Blu-rays and DVDs in the other room. Riparr is a 3D printed box with an optical drive and a tiny computer inside. You put a disc in, close the tray, and walk away. When the tray opens again, the movie is on your NAS as an MKV, named the way Plex and Jellyfin want it.
There is no screen, no keyboard and no power button. One USB-C cable runs the whole thing. The software is free and open source, and a setup app writes the SD card for you, so there is no terminal and no config file to edit.
This guide takes you from nothing to a working ripper in three parts:
- Part 1: Print and build the box. Four printed parts, a handful of cheap electronics, and a wiring diagram.
- Part 2: Put the software on the SD card. About five minutes of your time, and about ten more of waiting.
- Part 3: Set up and use the web interface. Point it at your NAS, switch on Auto Rip, and feed it discs.
What you are building
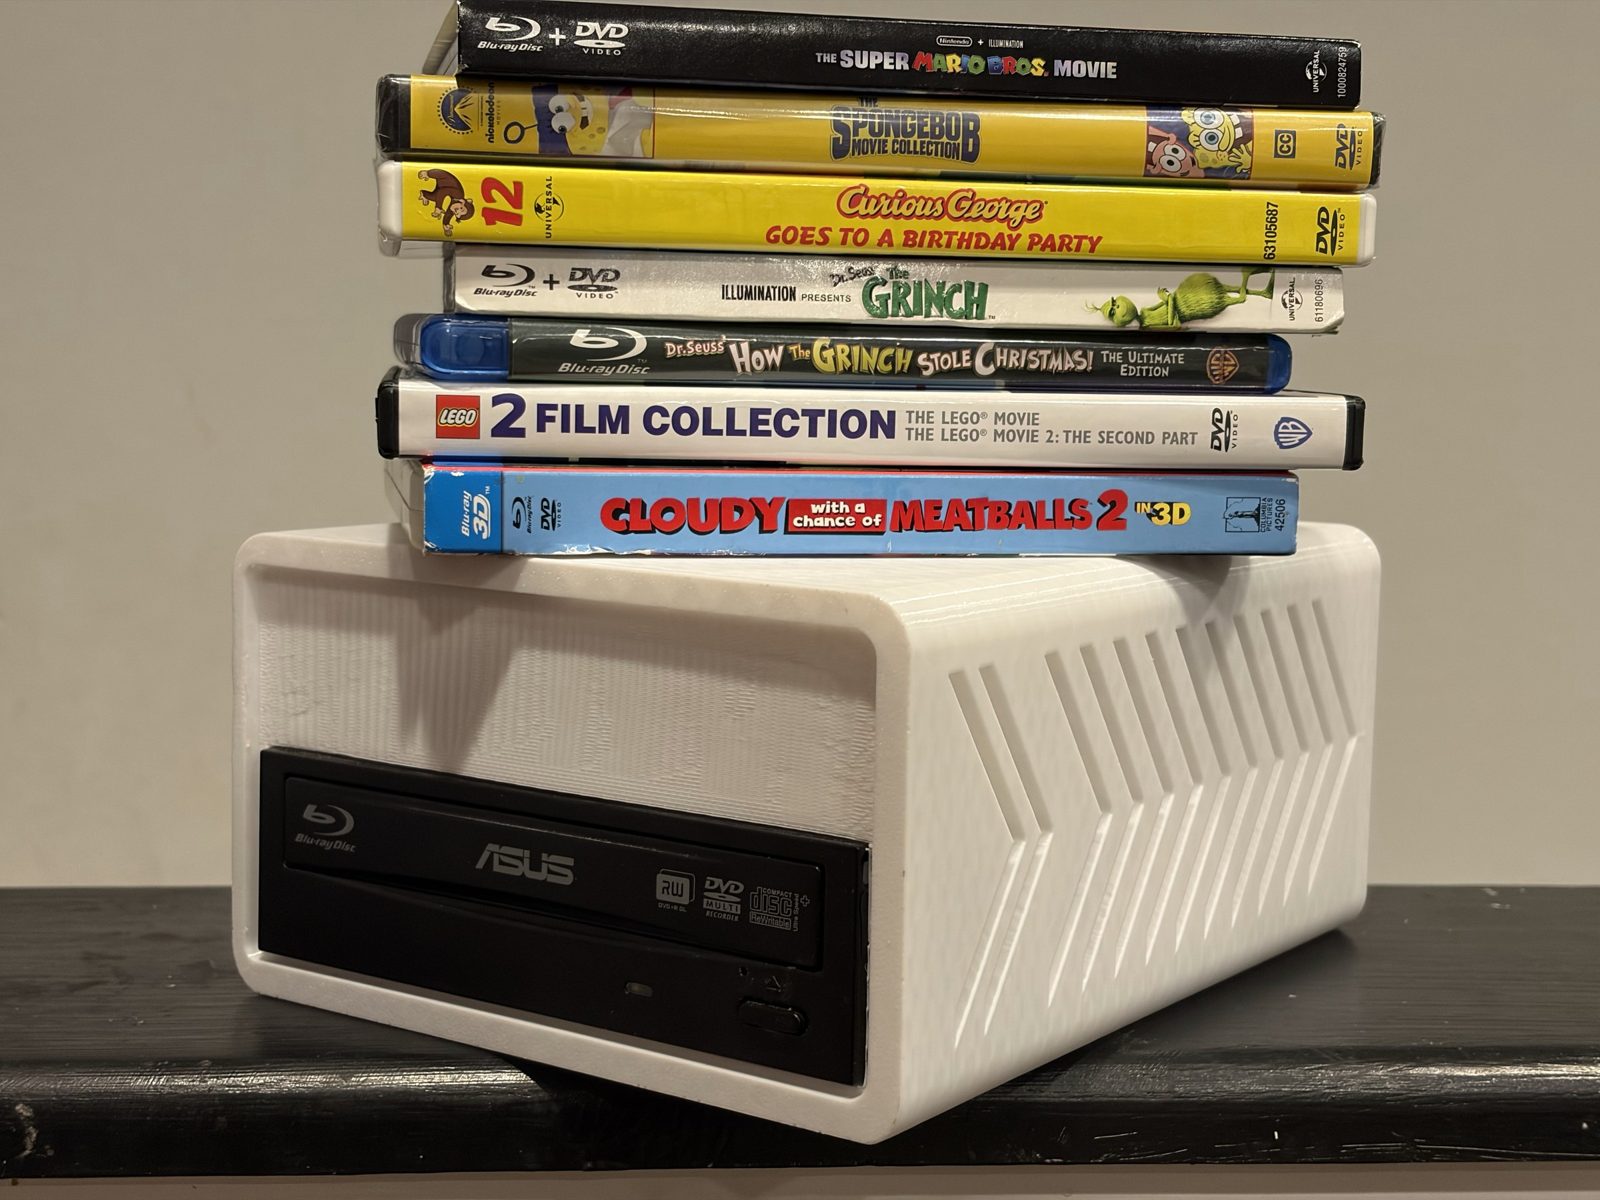
Riparr turns a spare full-size 5.25" desktop Blu-ray or DVD drive into a hands-off ripper. A small Orange Pi Zero 2W runs the software, the drive reads the disc, and MakeMKV does the ripping. The finished file is copied to your network share and checked before the disc is ejected, so an open tray always means the job is done.
- Rips Blu-rays and DVDs. Full-quality MKV files, no transcoding.
- Lands in your library ready to watch. Named for Plex and Jellyfin, written straight to your NAS over SMB.
- Headless. The tray is your status light. The web page is there for the days you want detail.
- Cheap. Apart from the board and the drive, every part is a few dollars. Filament is a few hundred grams.
Part 1: Print and build the box
What you will need
Everything here is off-the-shelf. The exact parts I used, with links, are in the “What you need” chapter of the GitHub guide, so you do not have to guess.
- An optical drive. A full-size 5.25" desktop drive. A DVD-only drive works, a Blu-ray reader is better, and a Blu-ray drive reads DVDs too.
- An Orange Pi Zero 2W (the 1 GB model is plenty). This is the tiny brain.
- A microSD card. 8 GB is enough. Rips go to your NAS, not the card.
- A USB-C charger, 45 W or more. Probably one you already own.
- The power parts, about $20 in all: a solderless USB-C PD trigger board, a 12 V buck converter, a 5 V buck converter, a USB-C pigtail cable, and lever-style wire connectors. No soldering iron needed.
- A SATA bridge and cable if your drive is a bare SATA drive from a PC. The bridge has to say it supports optical drives, and the cable should be a right-angle 22-pin SATA extension. Both are easy to buy wrong, so check the guide before ordering.
- A few small screws to mount the board and power parts to the Topper.
Want 4K UHD discs? That is a drive decision, made once at purchase, and most Blu-ray drives cannot do it. Read the drive section of the guide before you buy.
The four printed parts
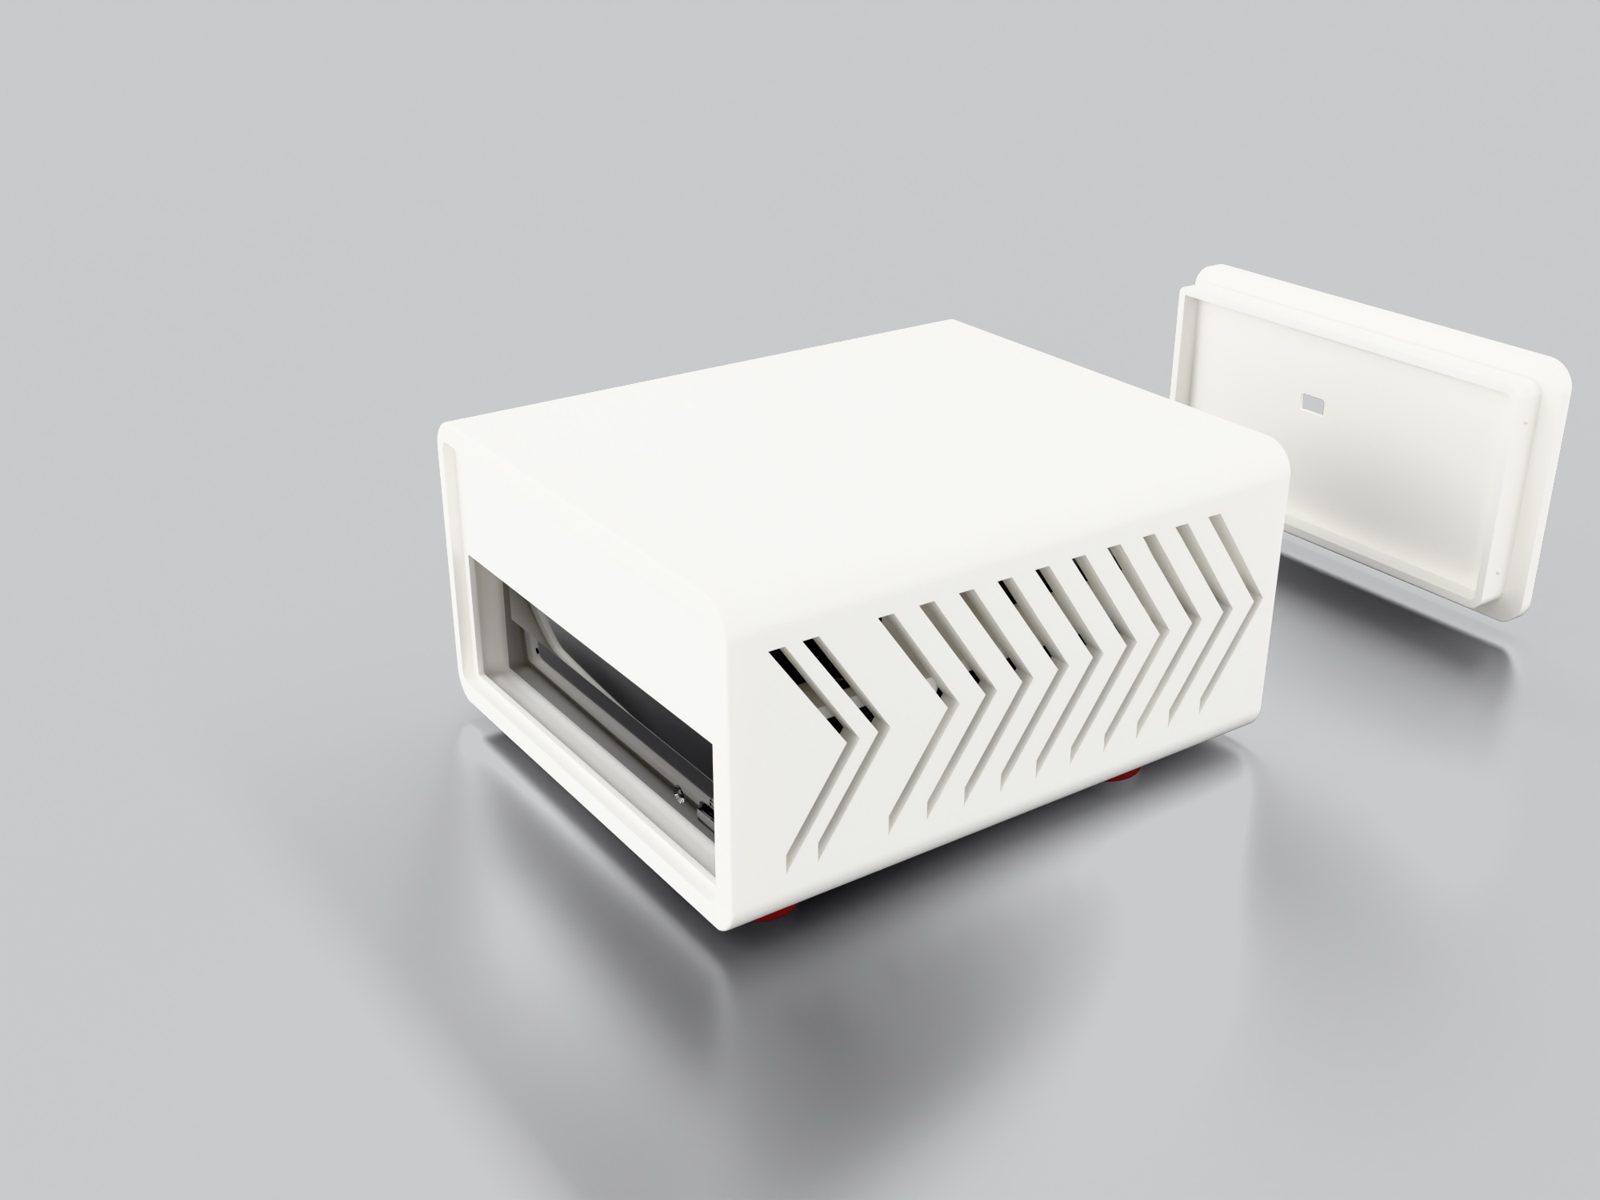
- Chassis. The main shell, with chevron vents for airflow.
- Rear Plate. Closes the back and holds the single USB-C port.
- Power Topper. A plate that sits on top of the drive and carries all the electronics.
- TPU Feet (optional). Four grippy feet that keep it quiet on a shelf.
Print settings
- Material: PETG (or ASA) for the Chassis, Rear Plate and Topper. Please do not use PLA. A spinning drive and a computer inside a closed box get warm enough to soften it.
- TPU for the optional feet.
- 0.4 mm nozzle, 0.2 mm layers, 2 walls, 15% infill, no supports.
- The Chassis prints standing up and is 195 mm tall, so you need a printer with that much height. The project file is set up for a Bambu Lab H2S. An A1 Mini edition is on the way.
- Roughly: Chassis 9 h 30 min and 298 g, Rear Plate 1 h 30 min and 55 g, Power Topper 2 h 15 min and 70 g, Feet 40 min and 8 g. About 14 hours in total.
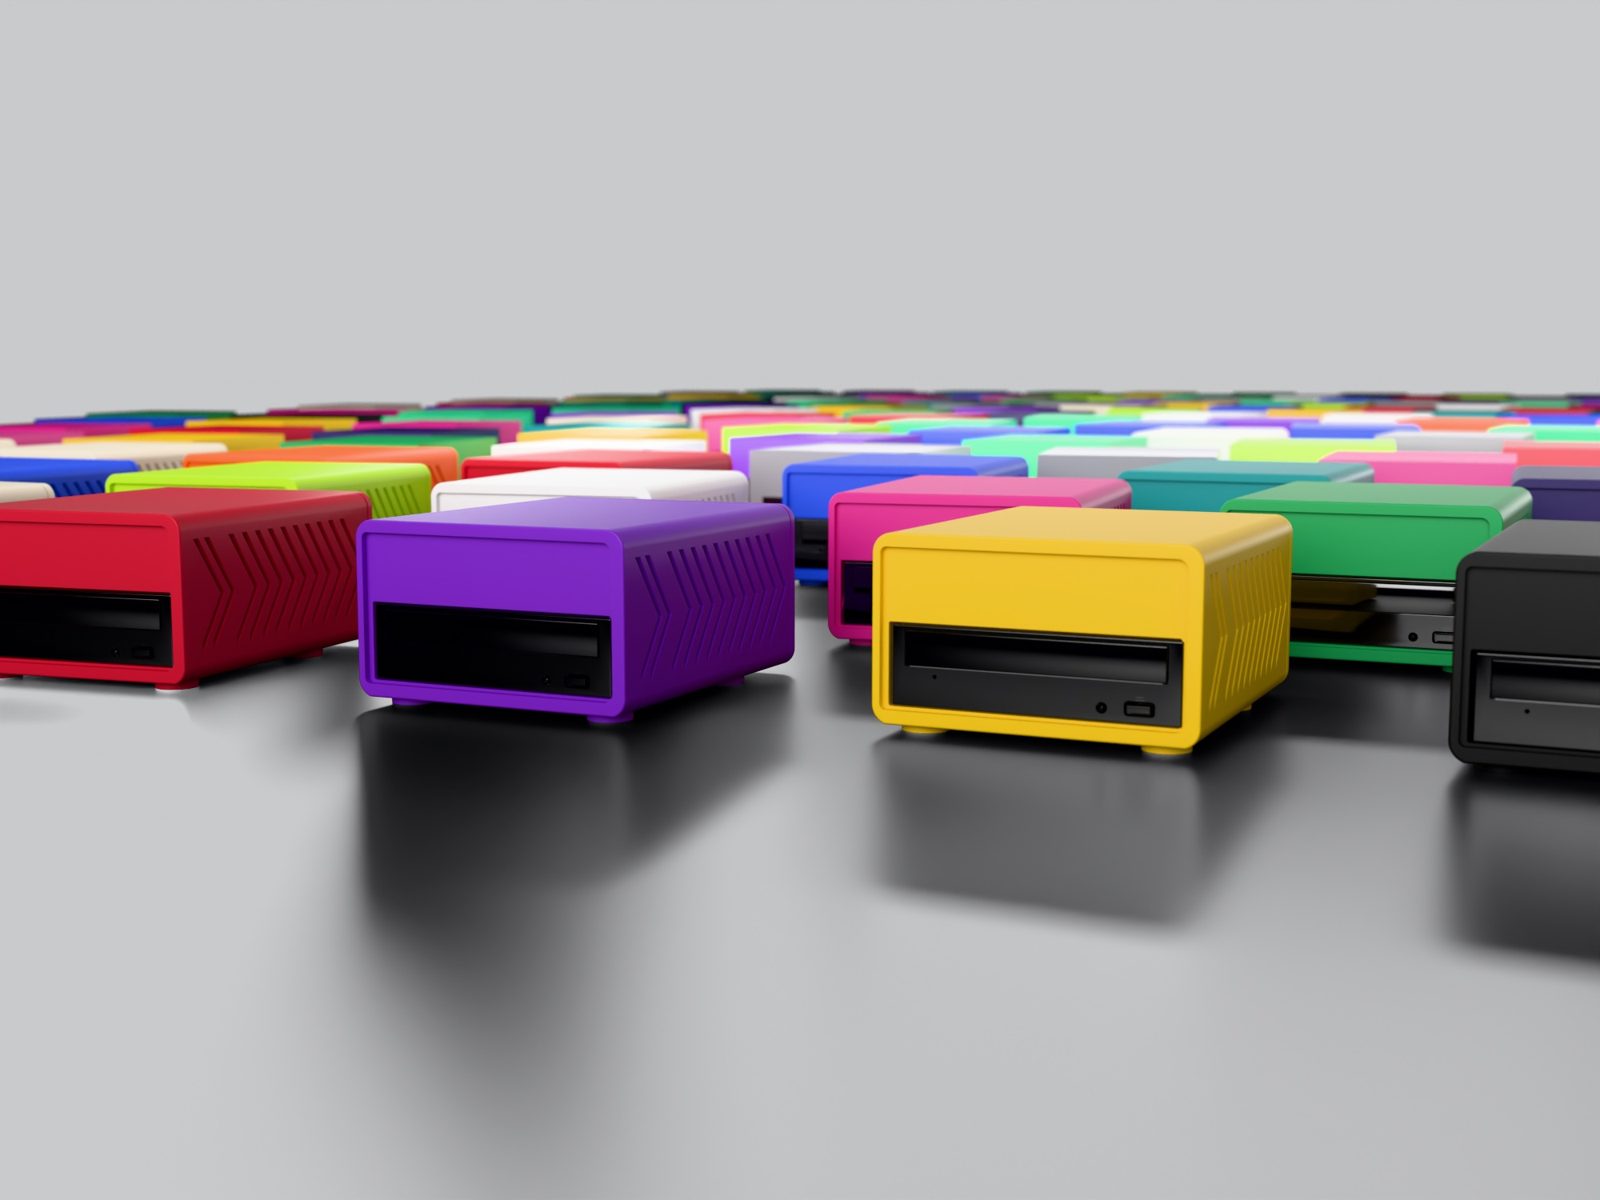
My box is white PETG with oxblood TPU feet, but any colour works. Match your shelf, your NAS or your mood.
Wire the Power Topper
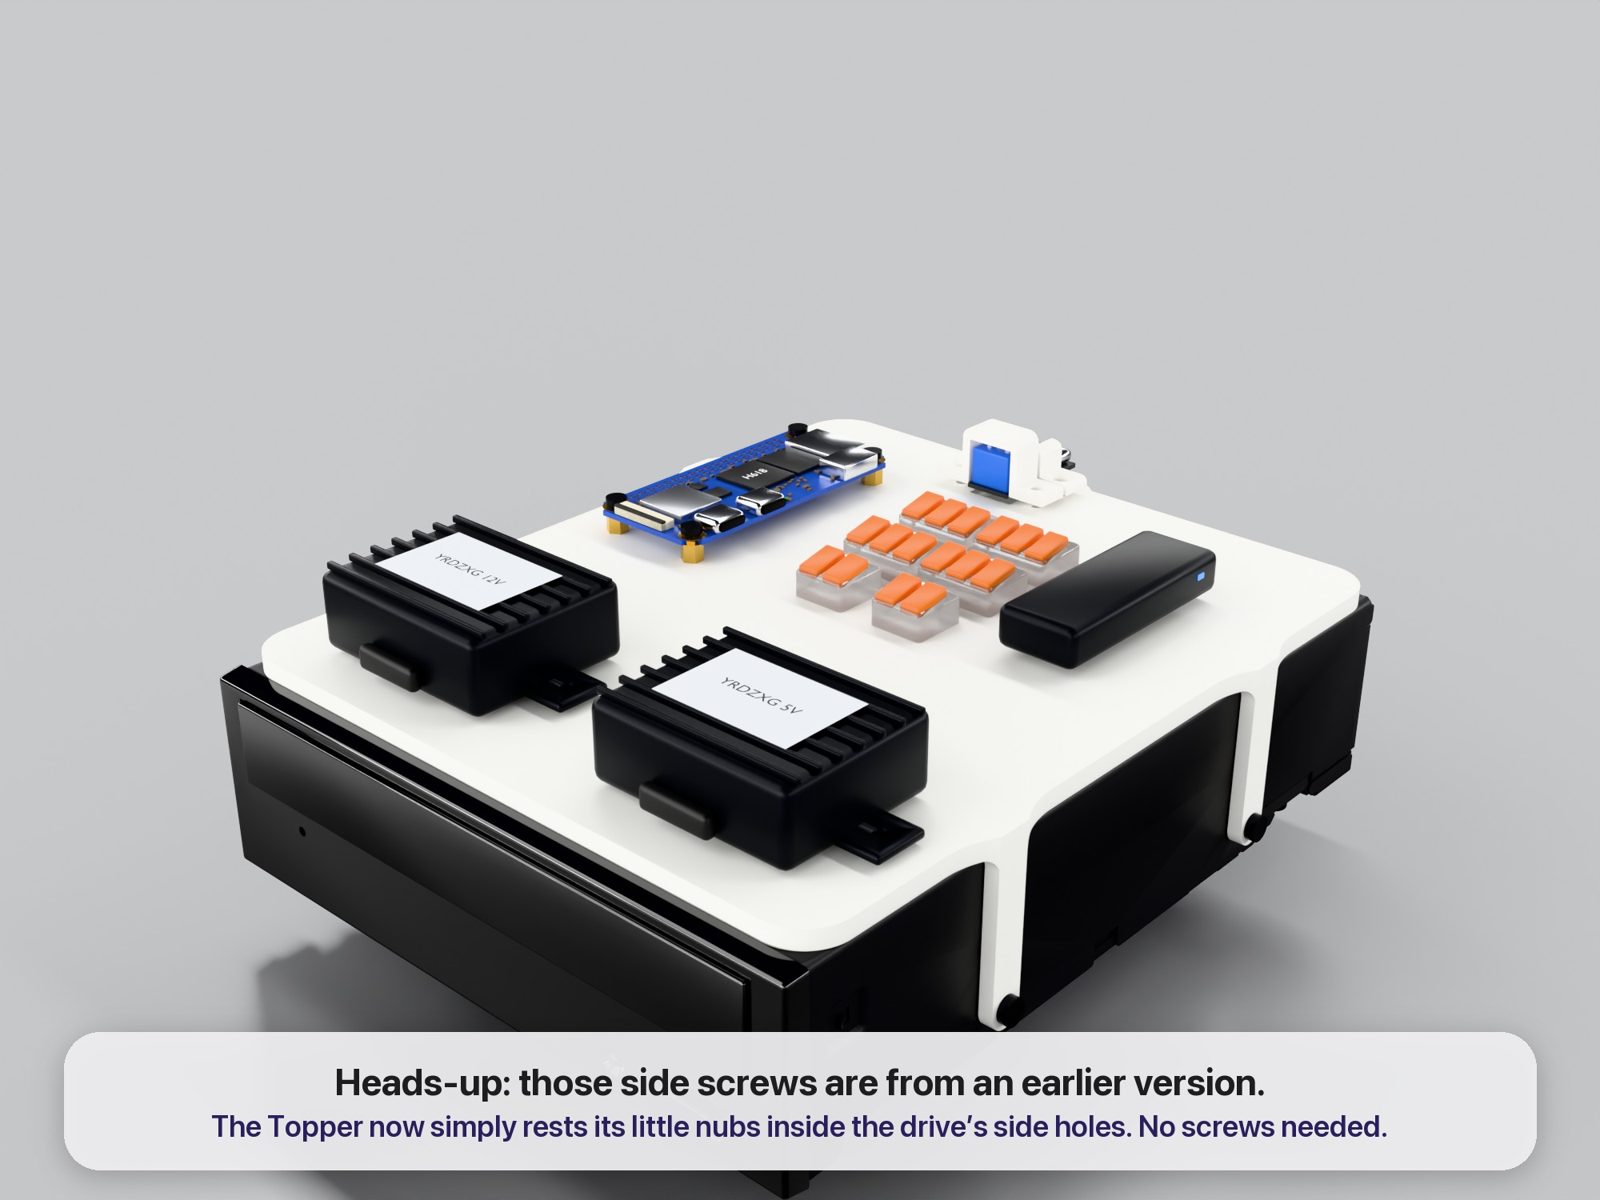
Screw the Orange Pi and the power boards to the Topper. The holes are already there and line up. Then wire everything with the diagram below. The lever connectors just clamp the wires, so nothing needs soldering.
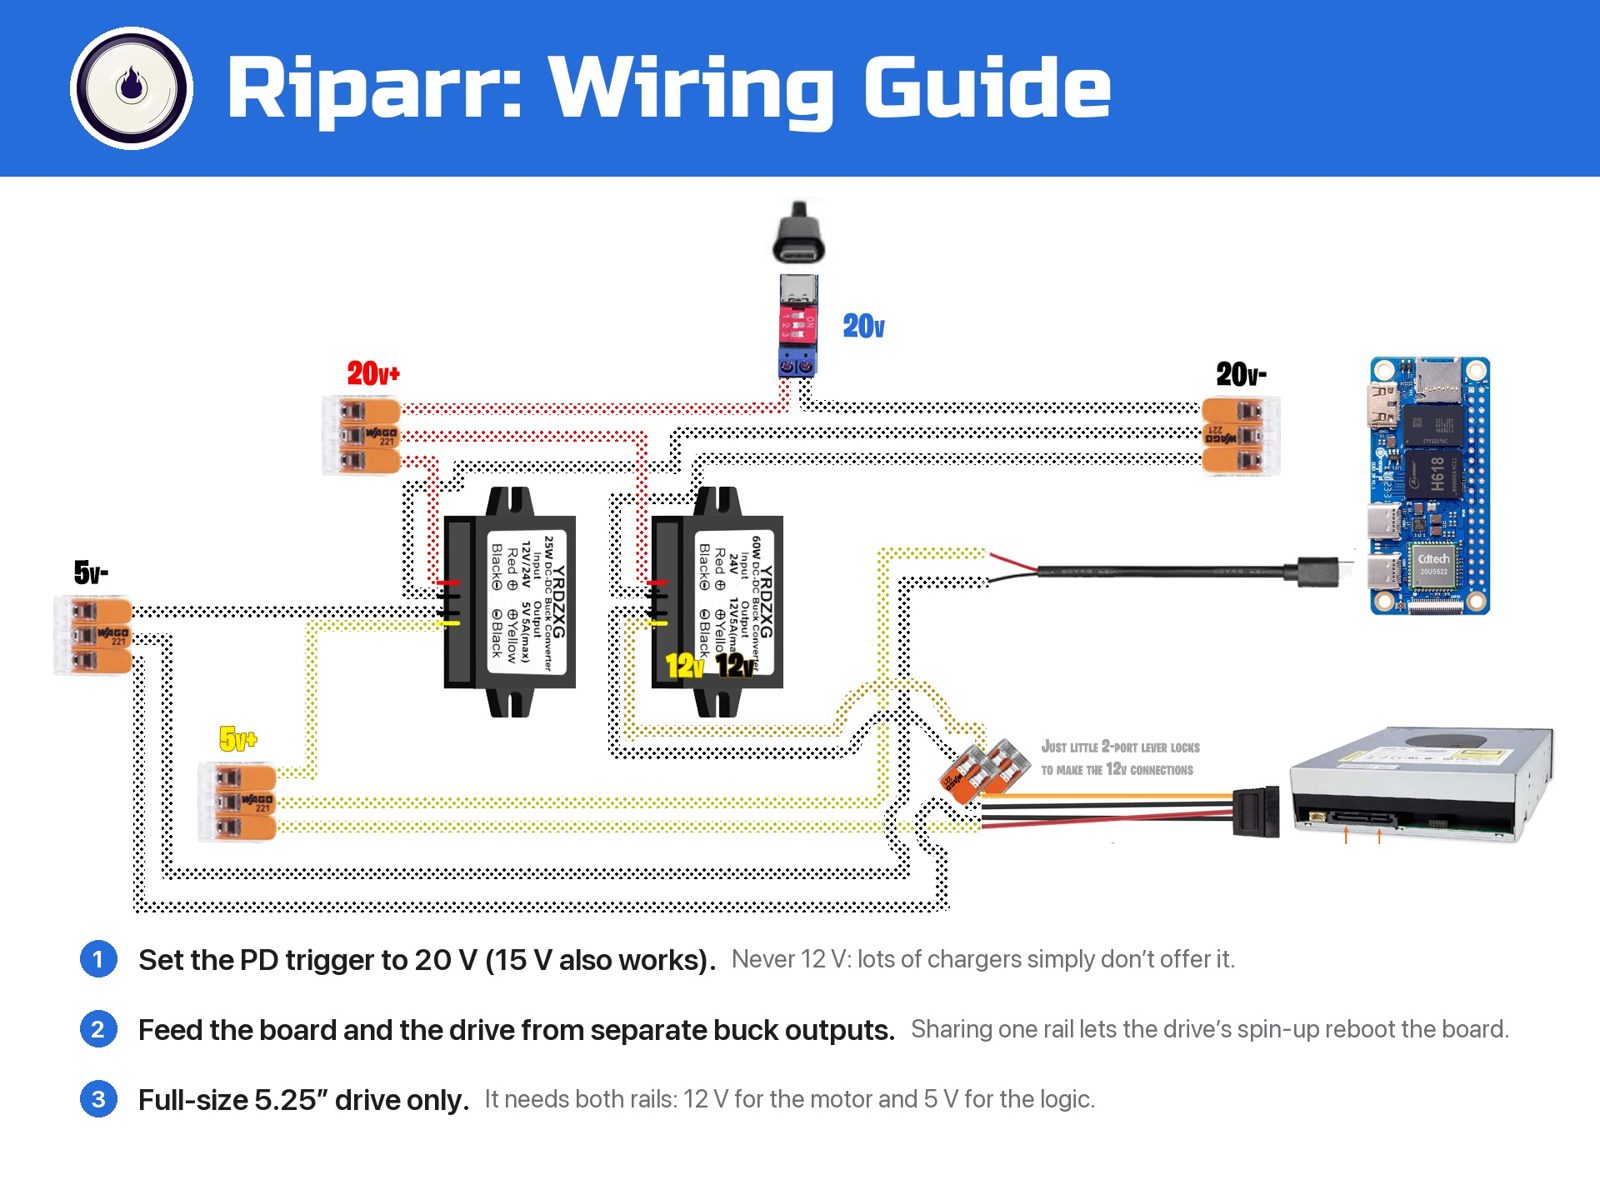
Three rules matter more than the rest:
- Set the PD trigger to 20 V (15 V also works). Never 12 V. It sounds like the obvious shortcut, but 12 V is optional in USB-C and plenty of chargers do not offer it. Any charger of 45 W or more offers both 15 V and 20 V.
- Feed the board and the drive from separate buck outputs. A drive pulls a sharp surge when it spins up. On a shared rail that surge reboots the board, and it looks exactly like a software bug.
- Full-size 5.25" drive only. It needs both rails: 12 V for the motor and 5 V for the logic.
Put it together
- Print the four parts using the settings above.
- Mount the Orange Pi and the power boards on the Power Topper and wire them.
- Set the PD trigger to 20 V with its little DIP switch.
- Set the Topper on the drive. The nubs on its legs rest in the drive’s own side holes, so no screws are needed there.
- Slide the drive and Topper into the Chassis from the open back.
- Plug the USB-C pigtail into the Orange Pi, fit the Rear Plate, and press the feet into the pockets underneath.
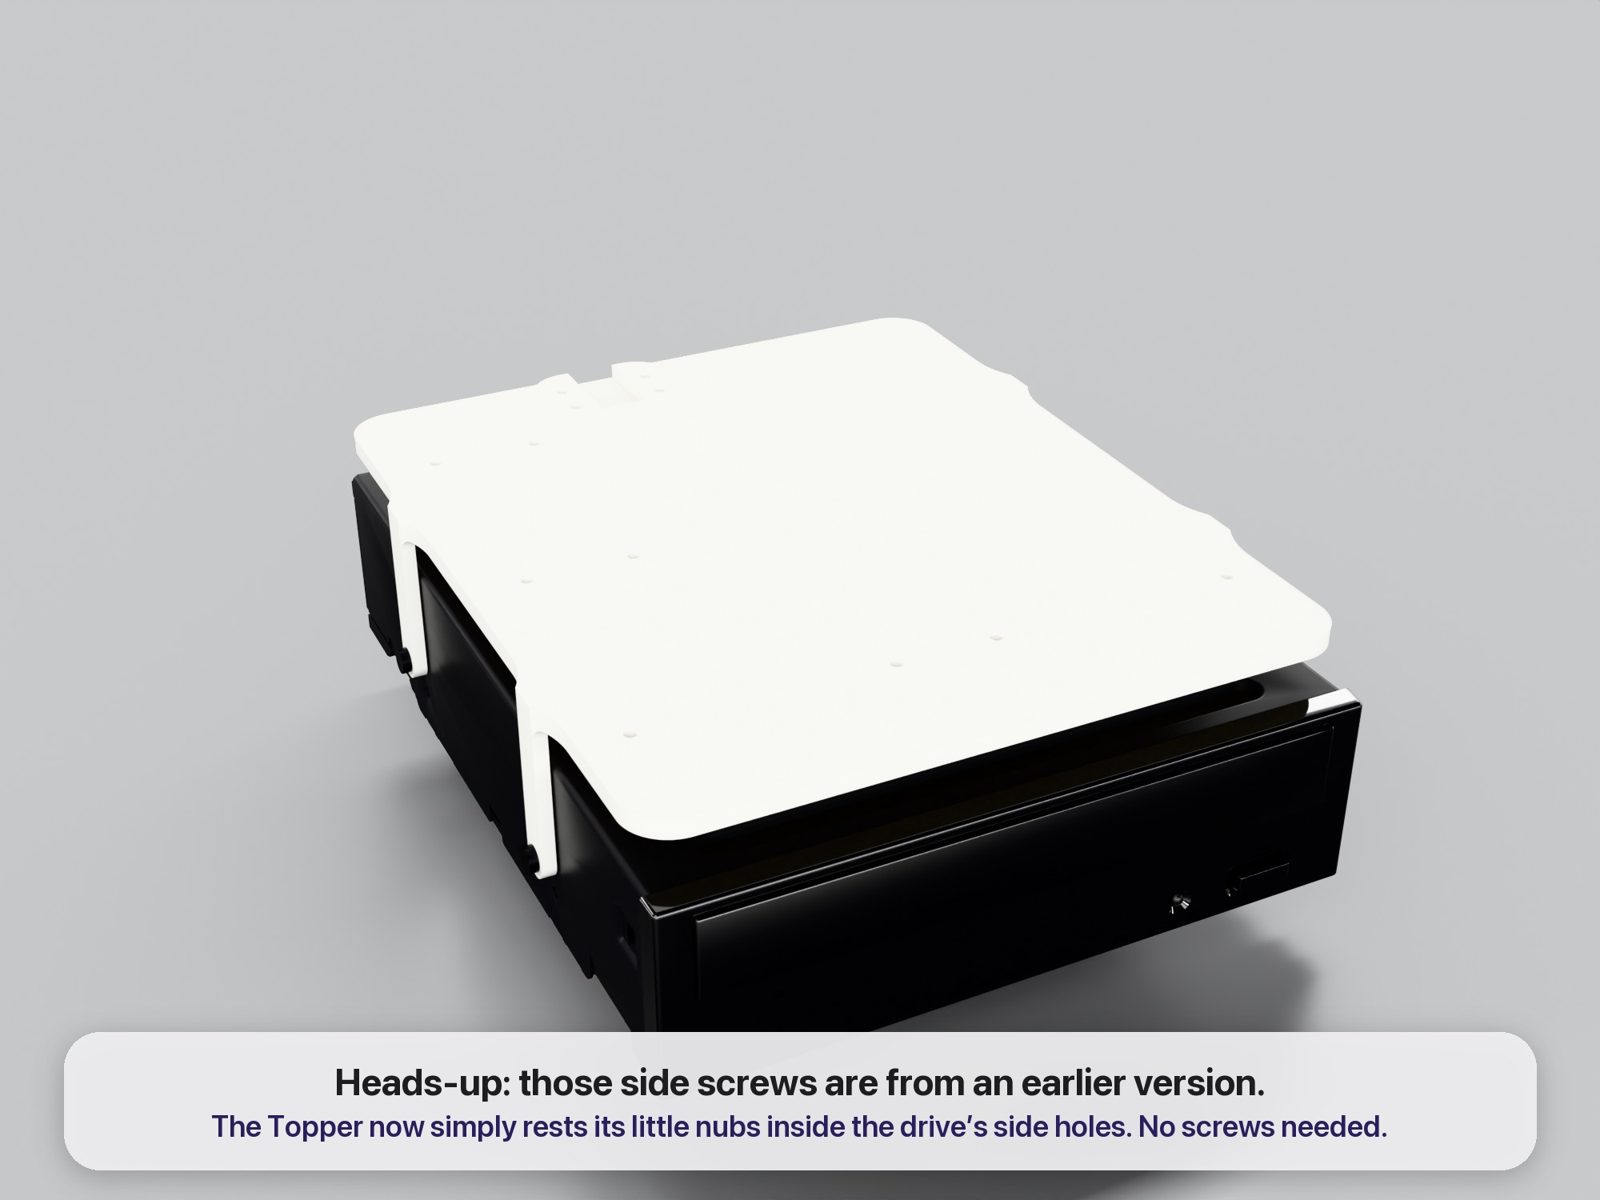
The renders above still show two side screws from an earlier version. You do not need them.
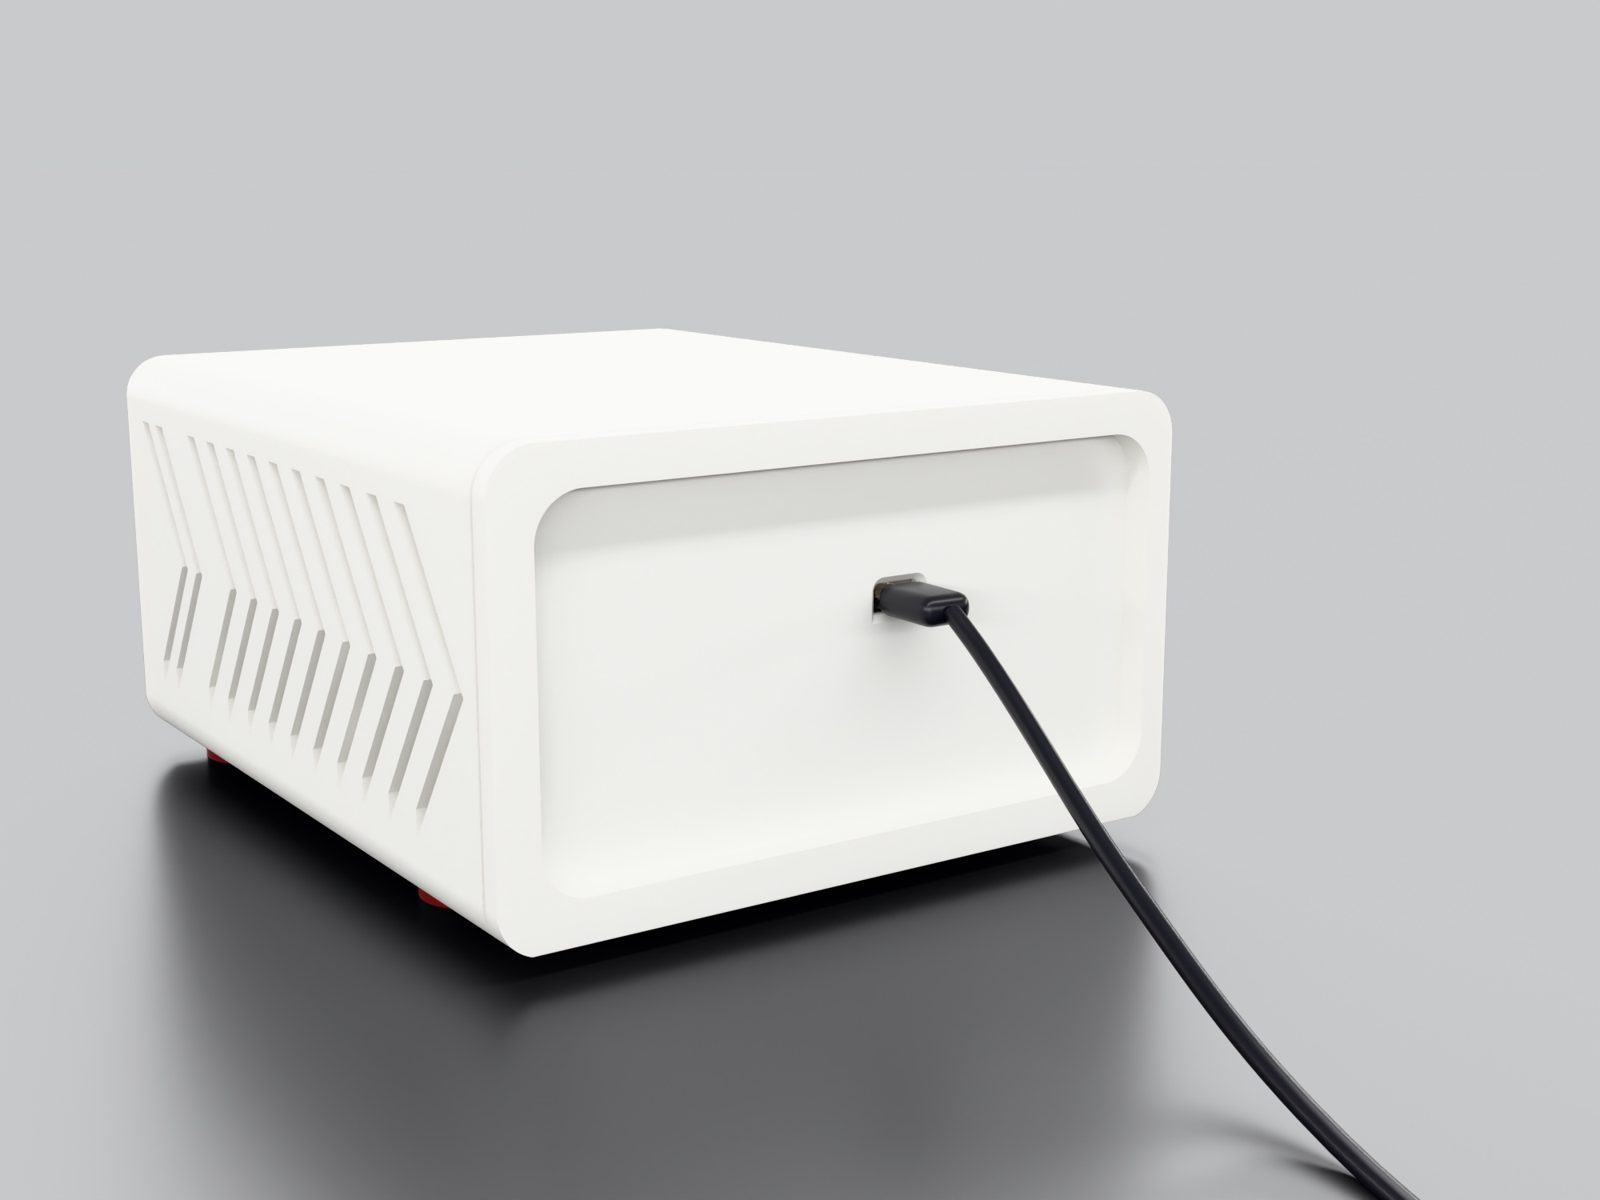
That is the whole external interface: one USB-C cable into a charger. Do not plug it in yet. The SD card goes in first, and that is Part 2.
Part 2: Put the software on the SD card
The Riparr Preparer is a free app for Mac, Windows and Linux. It writes the operating system to your SD card, puts your Wi-Fi on it, then waits for the box to appear and installs everything. It takes about five minutes at your computer and about ten more while the box installs itself.
Download it
- macOS (Apple Silicon): riparr-preparer-macos.dmg. Open it and drag Riparr Preparer into Applications.
- Windows: riparr-preparer-windows-beta.exe. Double-click it.
- Linux: riparr-preparer-linux-beta.tar.gz, or the ARM64 build. Unpack it and run Riparr Preparer.
Your computer will warn you the first time. The app is not code-signed yet, because a signing certificate is a yearly fee. On a Mac, double-click it, let it be refused, then open System Settings, Privacy & Security, scroll to the bottom and click Open Anyway. On Windows, click More info, then Run anyway. You can also check the download against the checksums on the release page.
Mac only: if the Preparer says it needs e2fsprogs, run brew install e2fsprogs in Terminal and open it again. It tells you before it touches the card.
Step 1: Write the card
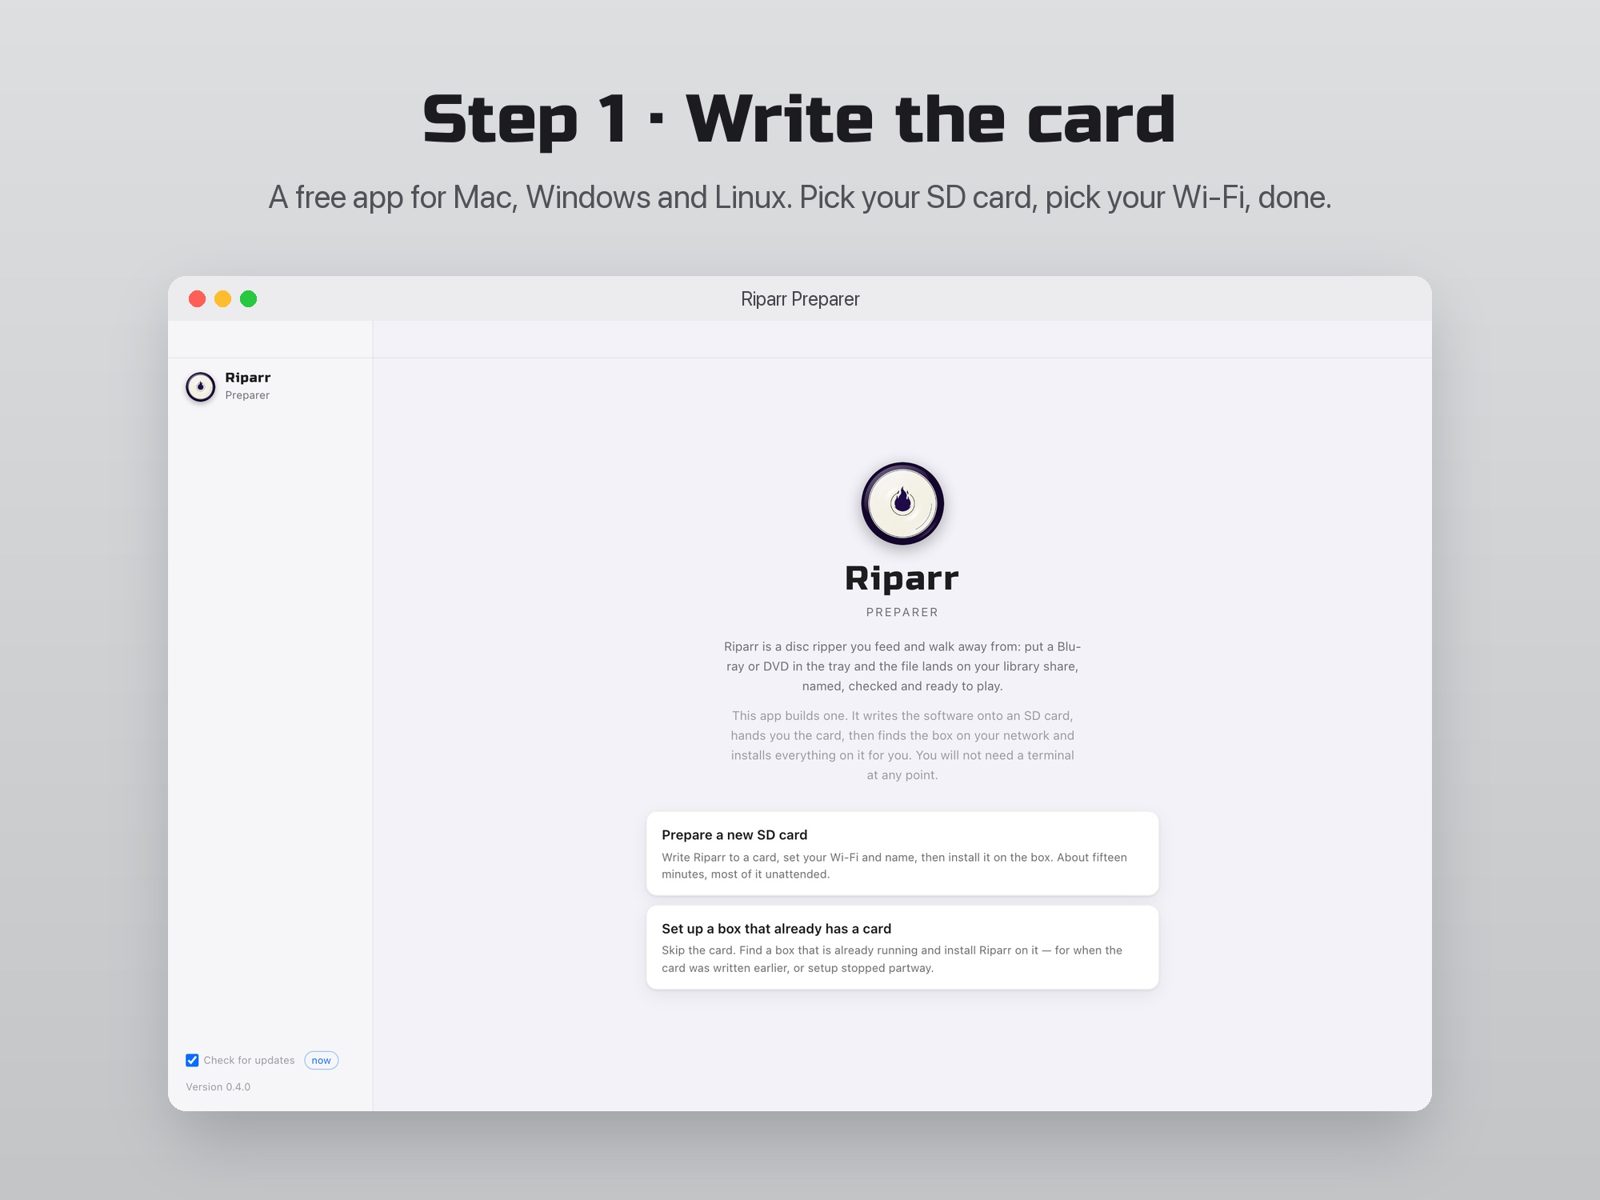
- Pick your board. Orange Pi Zero 2W is the default and the one I tested. Other boards are listed too, marked beta.
- Download the OS. The Preparer fetches the right image from the board maker and checks it against their published checksum.
- Pick your SD card. Your startup disk can never appear in the list, so you cannot pick the wrong one by accident.
- Choose your Wi-Fi. If your board is dual-band, 5 GHz networks are listed too and are the better pick when the box sits near the router. Your password is turned into a derived key before it is written, so the real password never touches the card.
- Name it and write. Leave the name as
riparrand that is how you will reach it. Your computer asks for permission once. Then the Preparer writes the card, reads it back to check it kept what was written, and ejects it.
Step 2: Plug it in
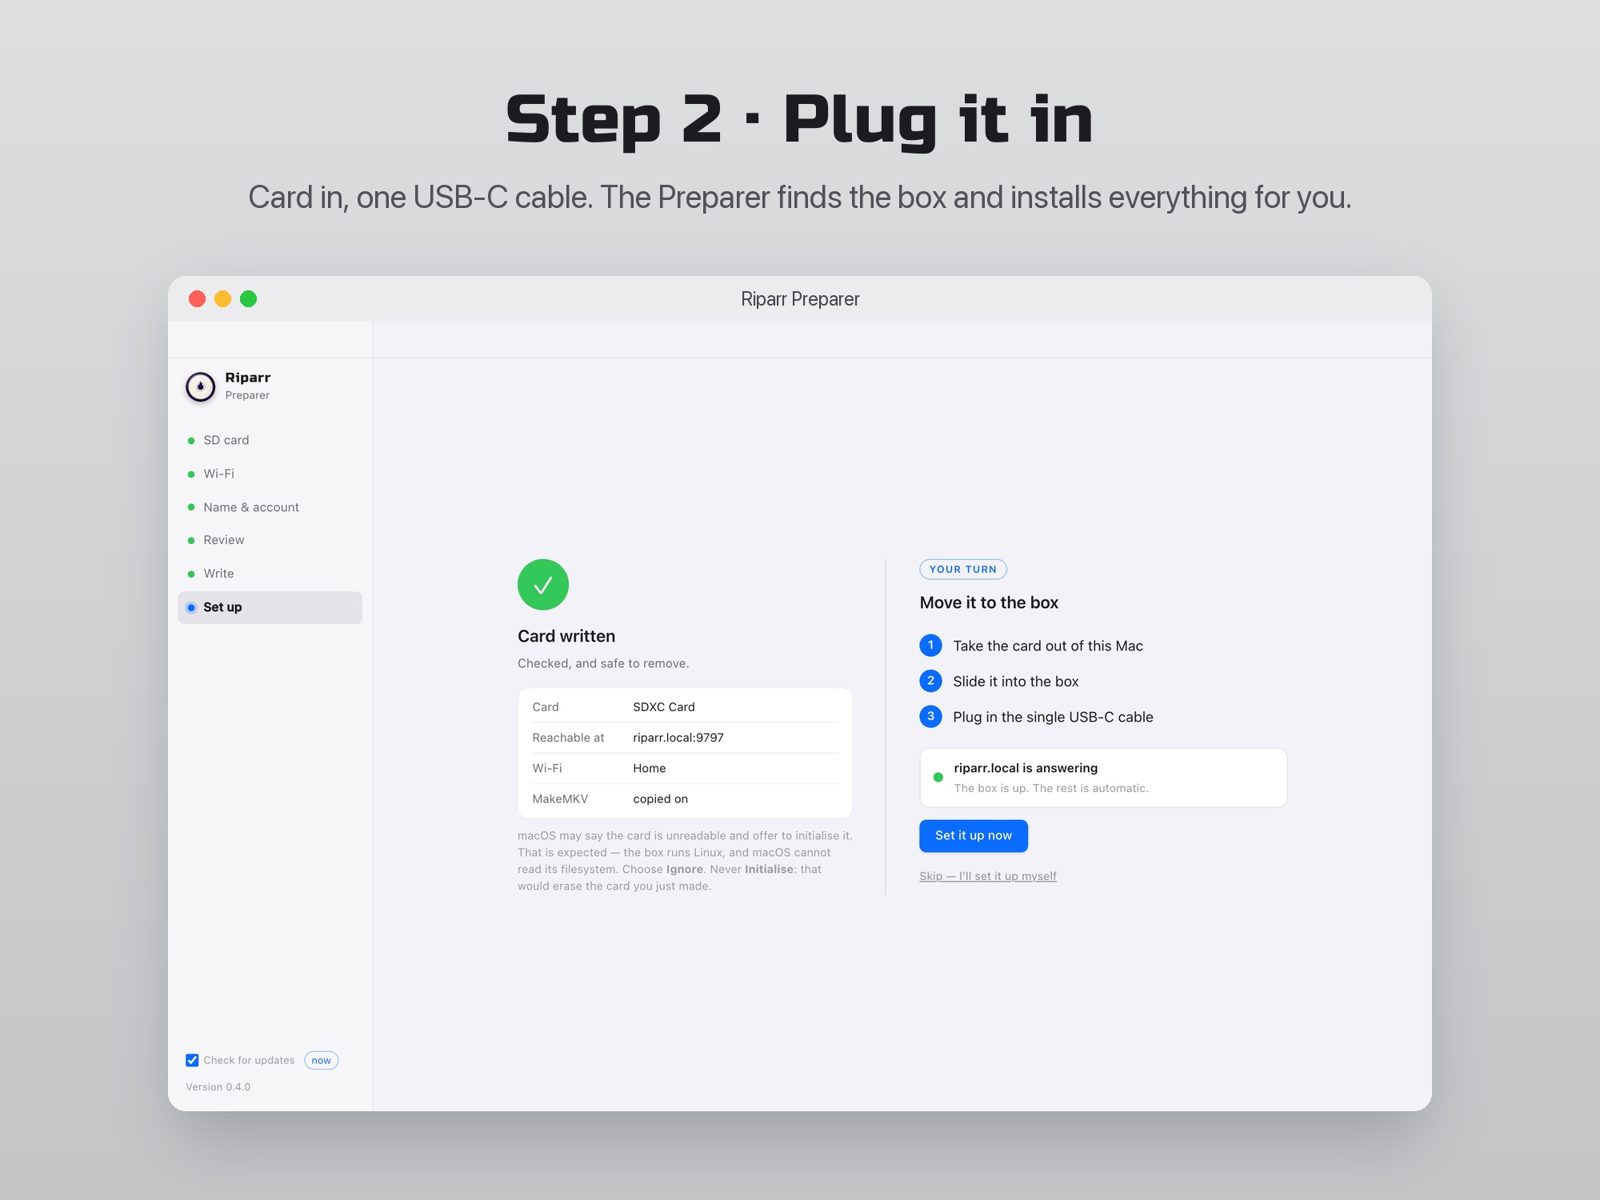
Slide the card into the Orange Pi, then plug the USB-C cable into your charger. The Preparer watches the network, and the next button unlocks the moment your box shows up. It then installs everything over SSH. Give it about ten minutes and go do something else.
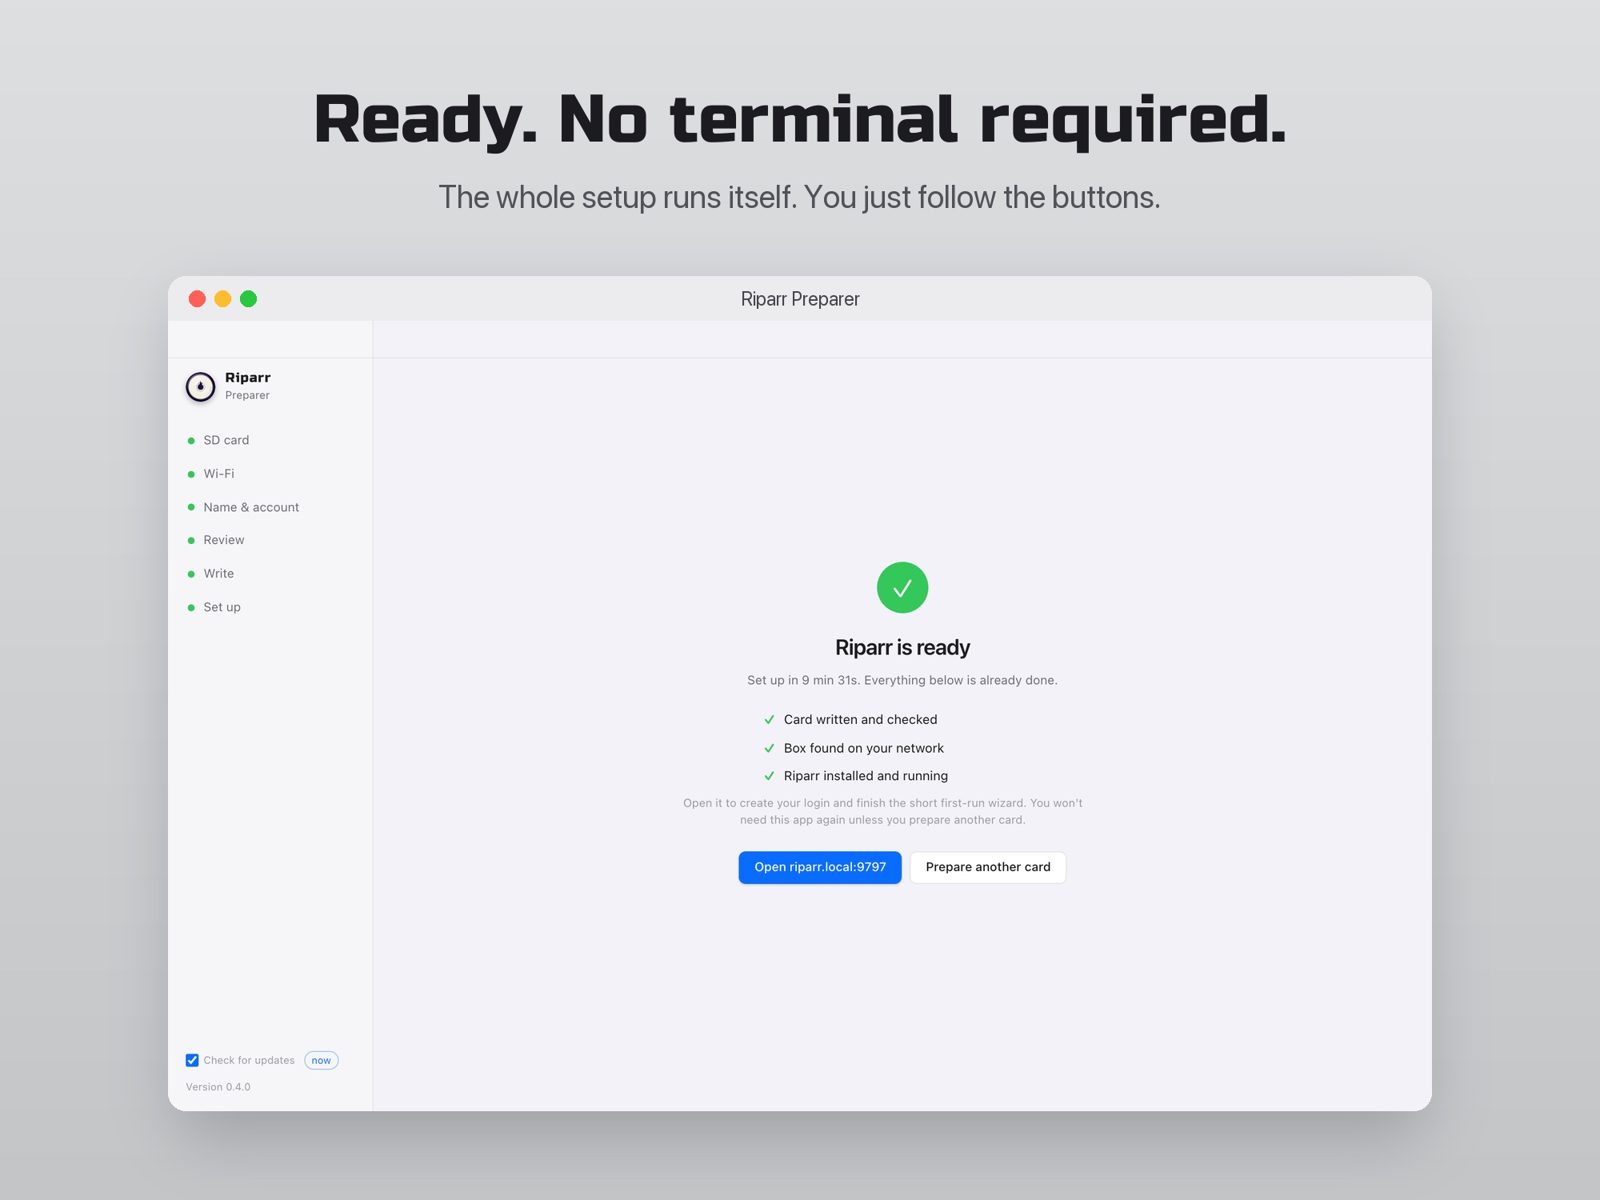
When you see Riparr is ready, the software is on the box. The Preparer is done and you can close it.
If your computer cannot see your Wi-Fi networks, choose Enter a name manually. If your laptop’s built-in SD slot does not show the card, a USB card reader will. The Windows and Linux versions are newer than the Mac one and still marked beta, so if something misbehaves, an issue on GitHub with your OS version helps a lot.
Part 3: Set up and use the web interface
Everything from here happens in a browser, on any device on the same network. The Preparer’s last screen has a button that opens it. Or type riparr.local:9797 into your address bar.
First visit: a five-step setup
The first time you open it, Riparr walks you through five short steps.
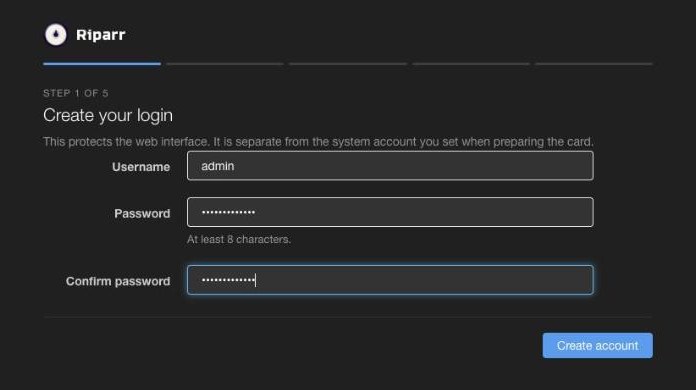
- Create your login. This protects the web page. It is separate from the account the Preparer set on the card. Nothing else is reachable until you do this.
- Disc reading. Riparr does not read discs itself, MakeMKV does. It is made by GuinpinSoft, so Riparr asks you to accept their licence before it downloads anything. It also shows which drive it found, and offers the current free beta key with one click. A purchased key works too.
- Where should finished rips go? Riparr scans your network for SMB shares, then writes a small test file, reads it back and deletes it. Pick your NAS from the list.
- How should files be named? The defaults follow Plex and Jellyfin conventions, so most people just click through. You can change them later in Settings.
- Riparr is ready. That is the last screen. You land on the Queue page.
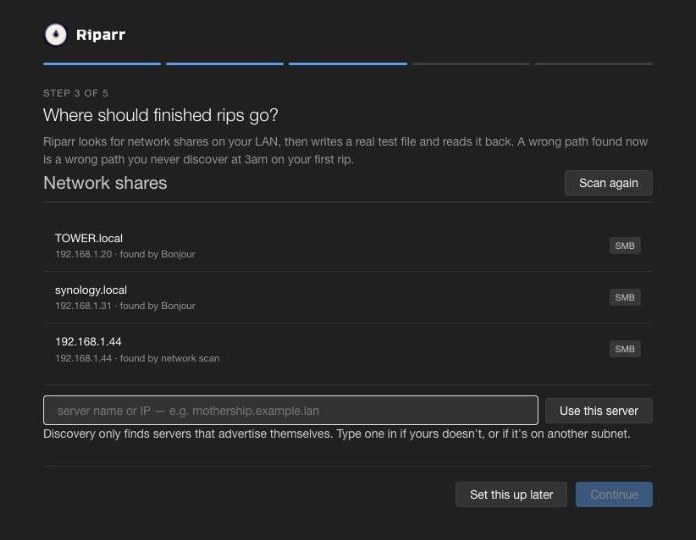
The share and the folder are two different boxes. If your NAS publishes a share called Media and your films live in Media/Movies/4K, the share is Media and the folder is Movies/4K. If you get NT_STATUS_LOGON_FAILURE, check the share name before you check the password, because many NAS boxes give the same error for both.
The Queue page
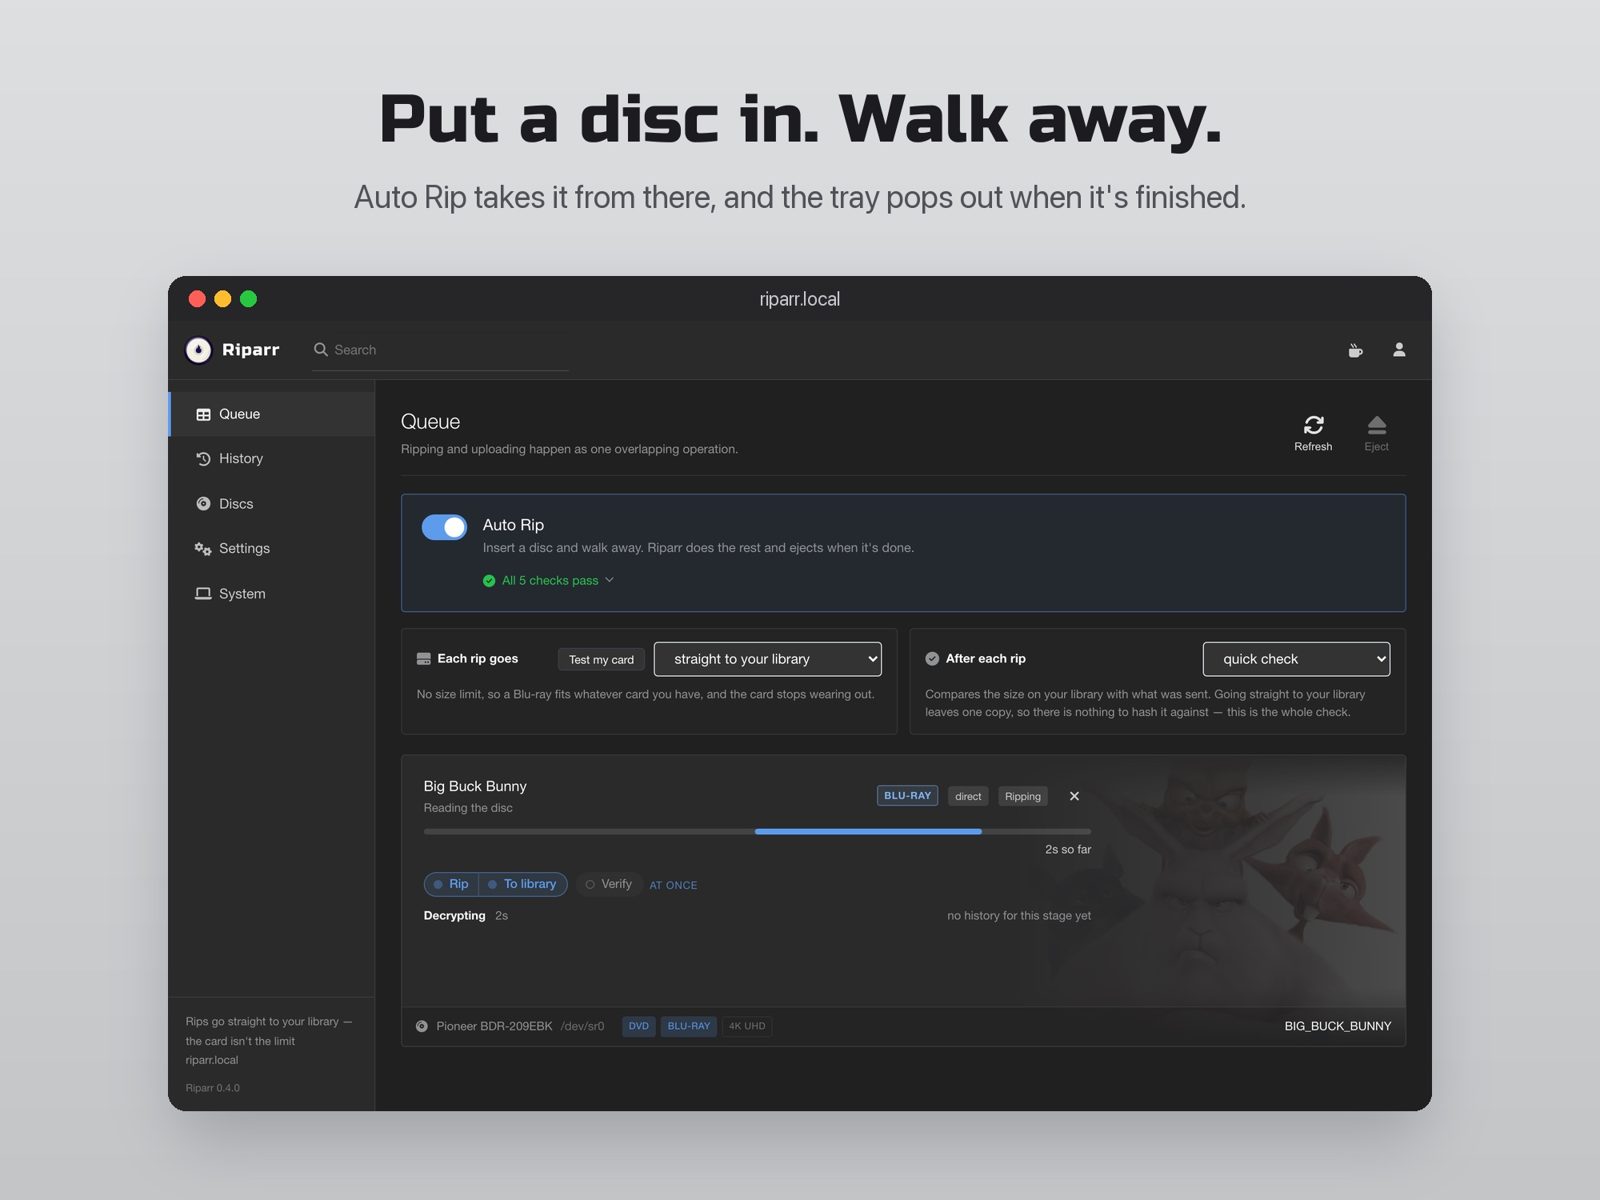
This is the page you land on. At the top is the Auto Rip switch. Turn it on and Riparr takes any disc you put in. Under the switch is a checklist of everything Auto Rip needs. If a row is not green, that row is your answer. Below that you see the disc in the tray, the drive holding it, and what stage the rip is at.
Ripping a disc
- Put a disc in and close the tray.
- Walk away.
- The disc ejects when the file is in your library and has been checked.
- Put the next one in.
A DVD takes roughly 20 to 30 minutes. A Blu-ray takes a few hours. Most of that time is the little computer unscrambling the disc’s copy protection in software, not the network. The queue shows the stage it is in and a running clock rather than a made-up percentage.
Not sure what the box is doing without looking at a screen? The disc is the signal. Tray shut and the drive working means ripping, so leave it alone. Tray open means it is done, or it gave up and the page says why. You can also get Discord or webhook notifications under Settings, then Notifications.
History, Discs and Settings
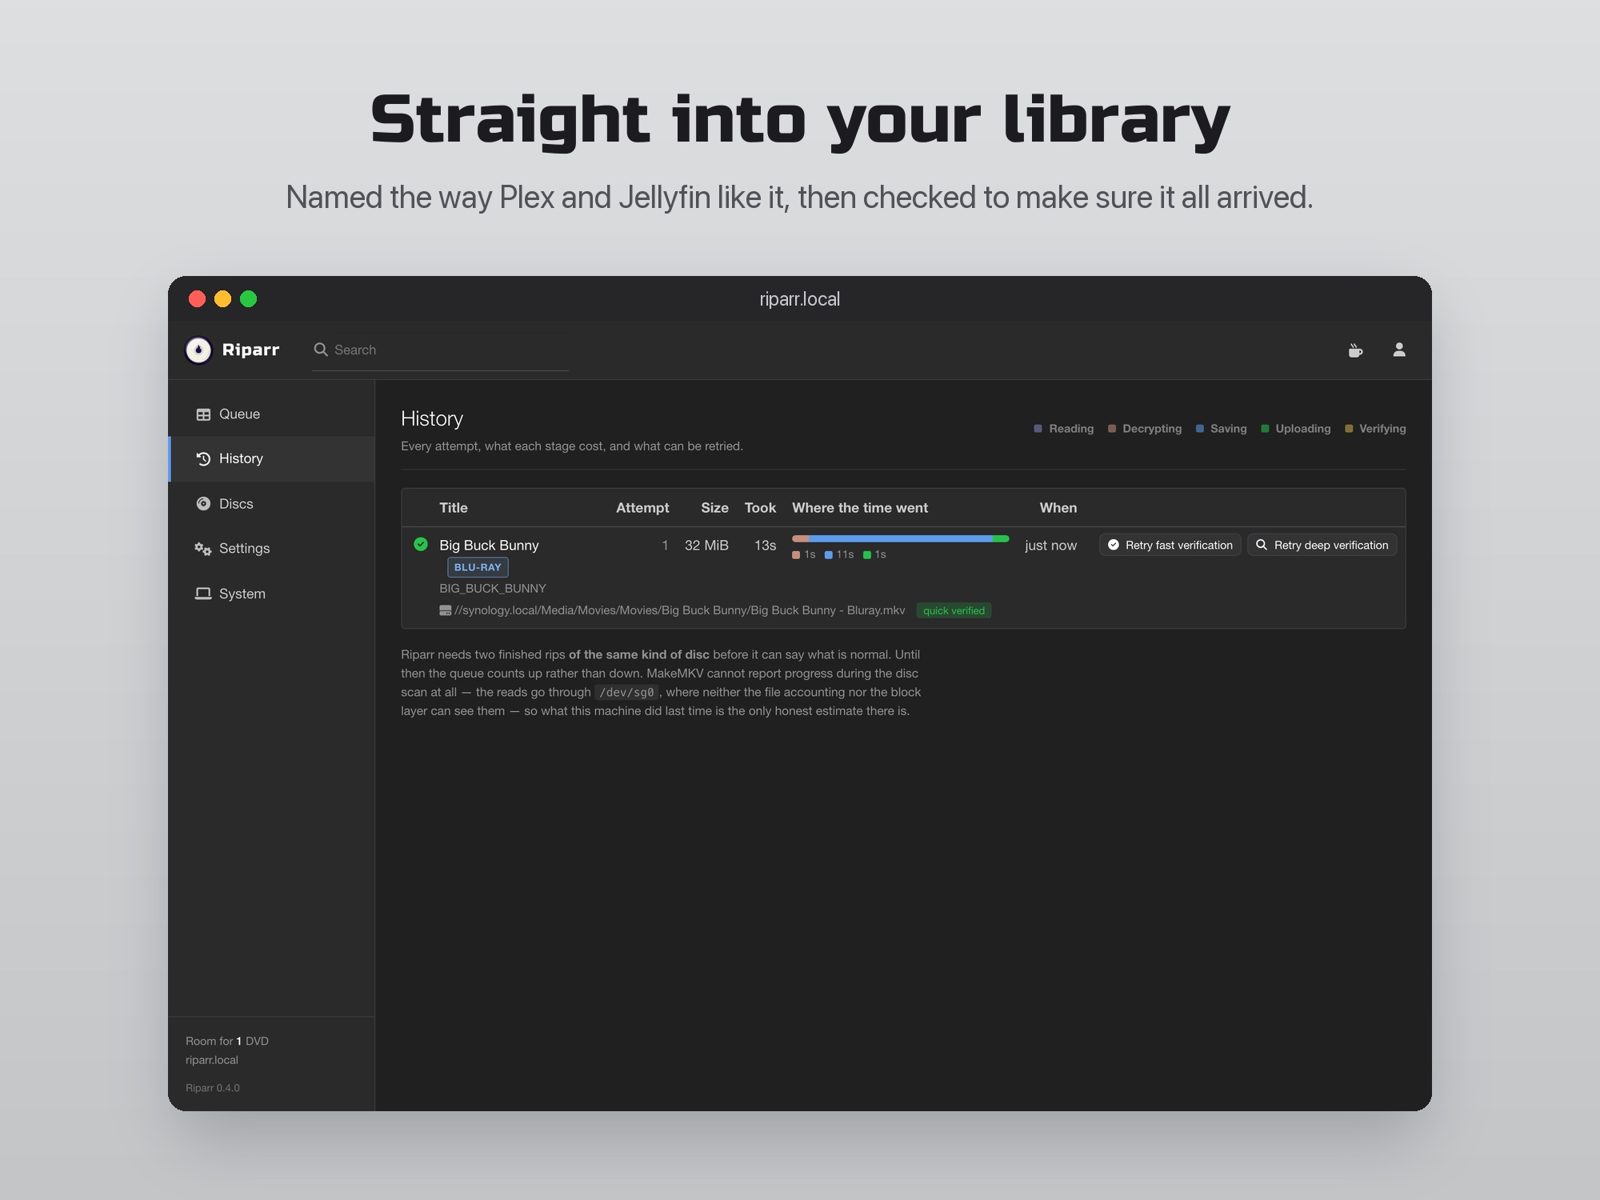
- History lists every attempt with its result and how long each stage took. If anything goes wrong, start here. Each row offers only the retries that would help, such as Retry upload after a network hiccup, which skips the disc entirely.
- Discs shows what you have already ripped. If you put a ripped disc in again, Riparr gives it straight back instead of spending half an hour re-ripping it. The Re-rip button is on the tile if you meant it.
- Settings holds your shares, where films and television go, notifications and the MakeMKV key. You should not need to open it again after setup.
- System shows the box’s status, including whether your drive can read 4K discs.
The MakeMKV beta key expires every month. Riparr fetches the new one itself and tells you it did. A purchased key makes the chore go away.
Keeping it updated
The box and the Preparer each watch for new releases and tell you. Nothing installs until you click.
Frequently asked questions
Can I 3D print a Blu-ray ripper?
Yes. Riparr is a four-part printed enclosure for a full-size optical drive and an Orange Pi Zero 2W, with a free open source ripping appliance on top. You print the parts in PETG, wire a few cheap boards and write an SD card.
Does it rip 4K UHD discs?
Only with a drive that MakeMKV’s LibreDrive supports, and most Blu-ray drives are not on that list. Check the drive section of the guide before you buy.
Can it play the movies, or transcode them?
No to both. It makes a full-quality MKV copy and puts it in your library for Plex or Jellyfin to play. Shrinking files later is a job for a tool like Tdarr or Unmanic, which can watch the folder.
Is it legal?
Rip discs you own, for your own library. Laws about copy protection differ between countries, so check yours.
Does it work with a different board?
The Orange Pi Zero 2W is the tested board. Others are available in the Preparer’s board list and are marked beta.
Get it
If you build one, I would love to see it. Bugs and ideas for the software are welcome on GitHub. Happy ripping!
How are you connecting the Drive to the Board for Data?