[Go download it!]
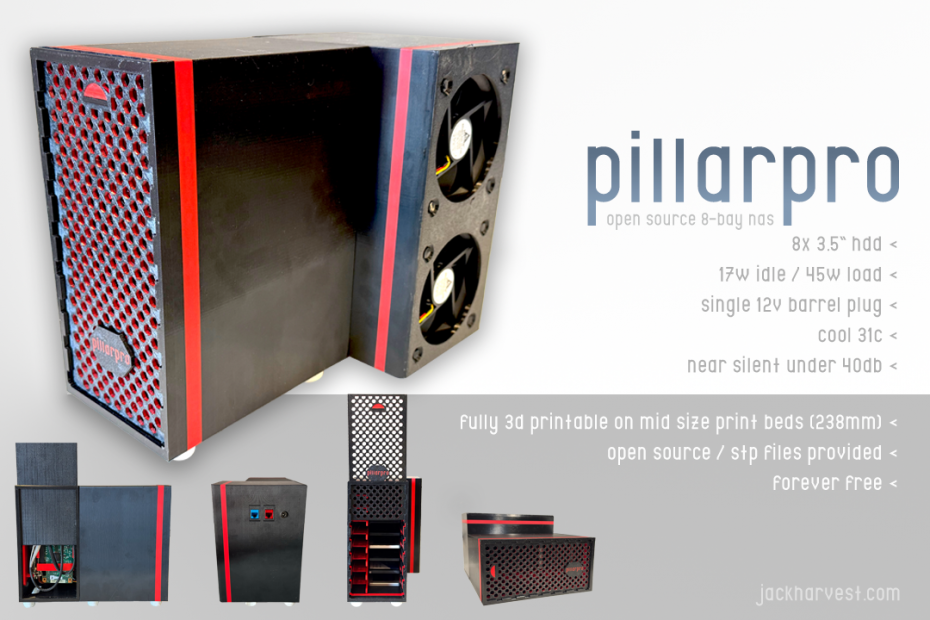
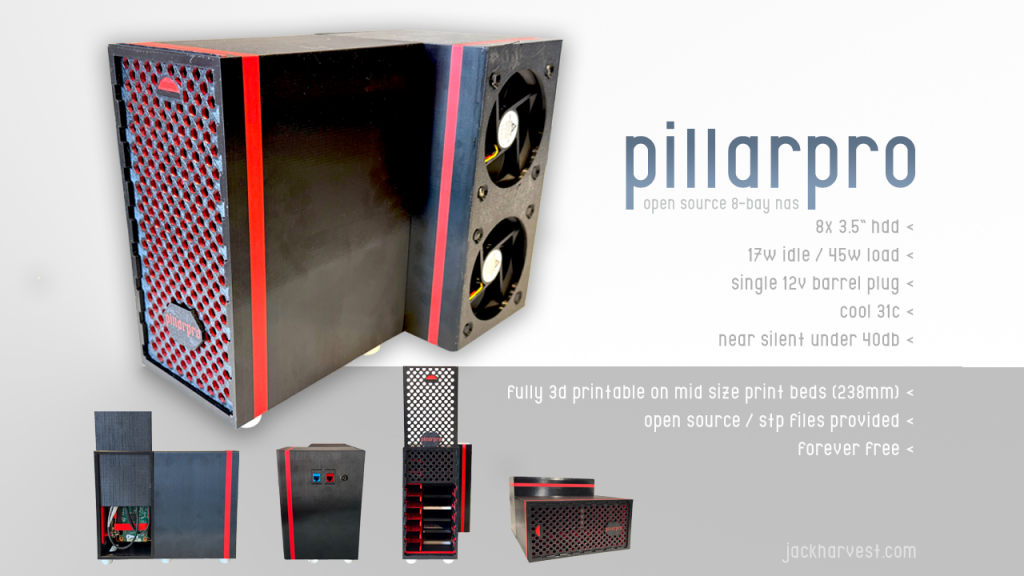
Pillarpro takes an 8-bay $1000 Synology-like approach, and delivers a DIY solution into your lap for under $200. Potentially for under $100, depending on how much crap you already own.
Requirements.
- Must sip power.
- Must be economical.
- Must be quiet.
- Must be cool.
- Must be easy to print & build.
I consider Mini-ITX not aggressive enough for power savings, no matter the processor dropped in. Thus, a SOC (system on a chip) solution is required. Laptops and Mini PCs have their processor baked on, and have a far lower TDP than any desktop variant.
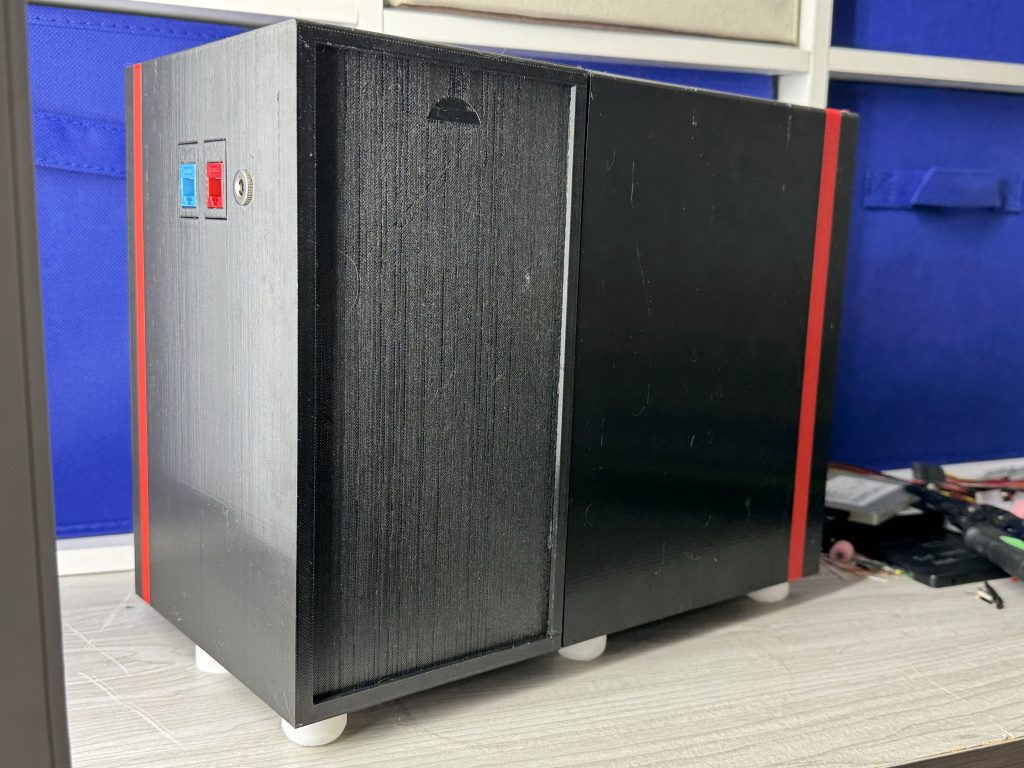
Meet the PillarPro.
I was going to start with a purchase sheet, but, I think its more exciting to show what you’re getting first.
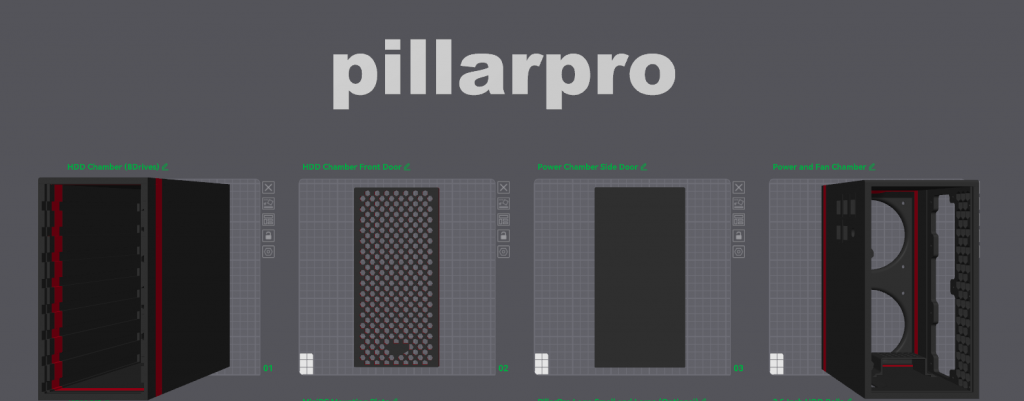
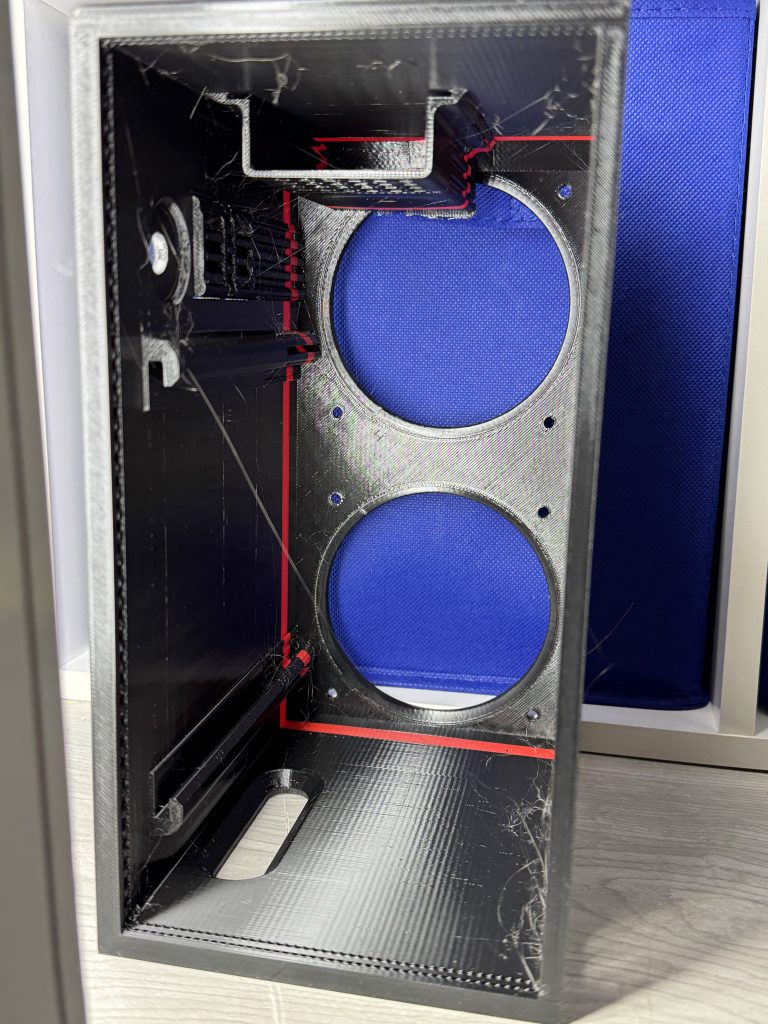
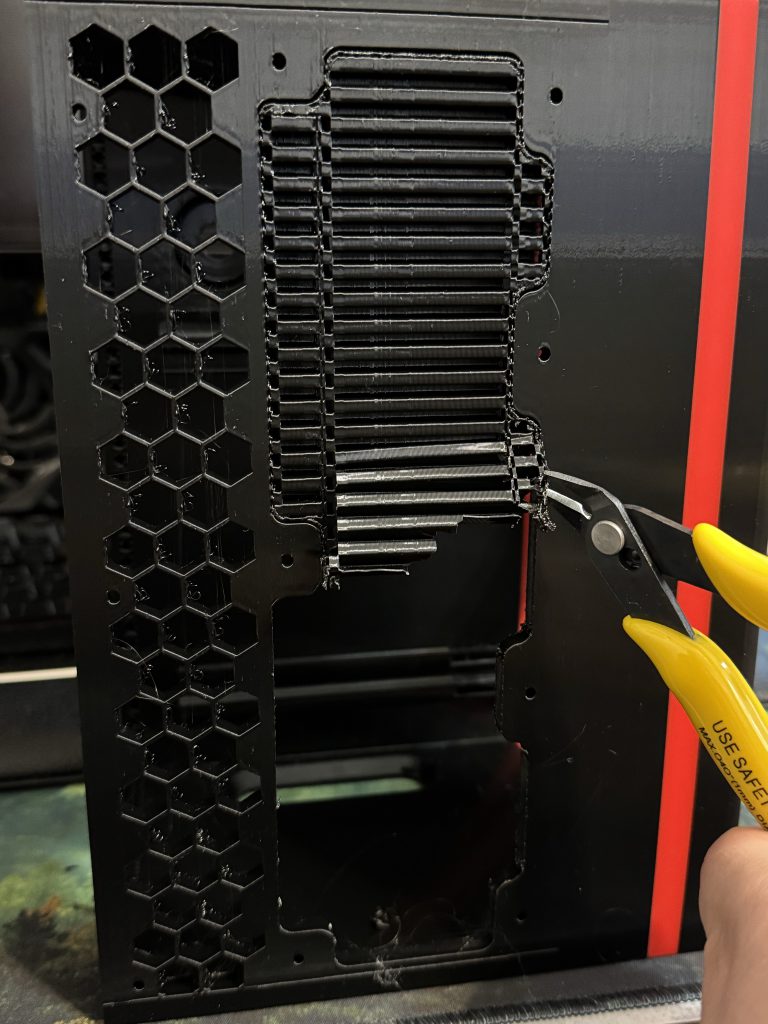
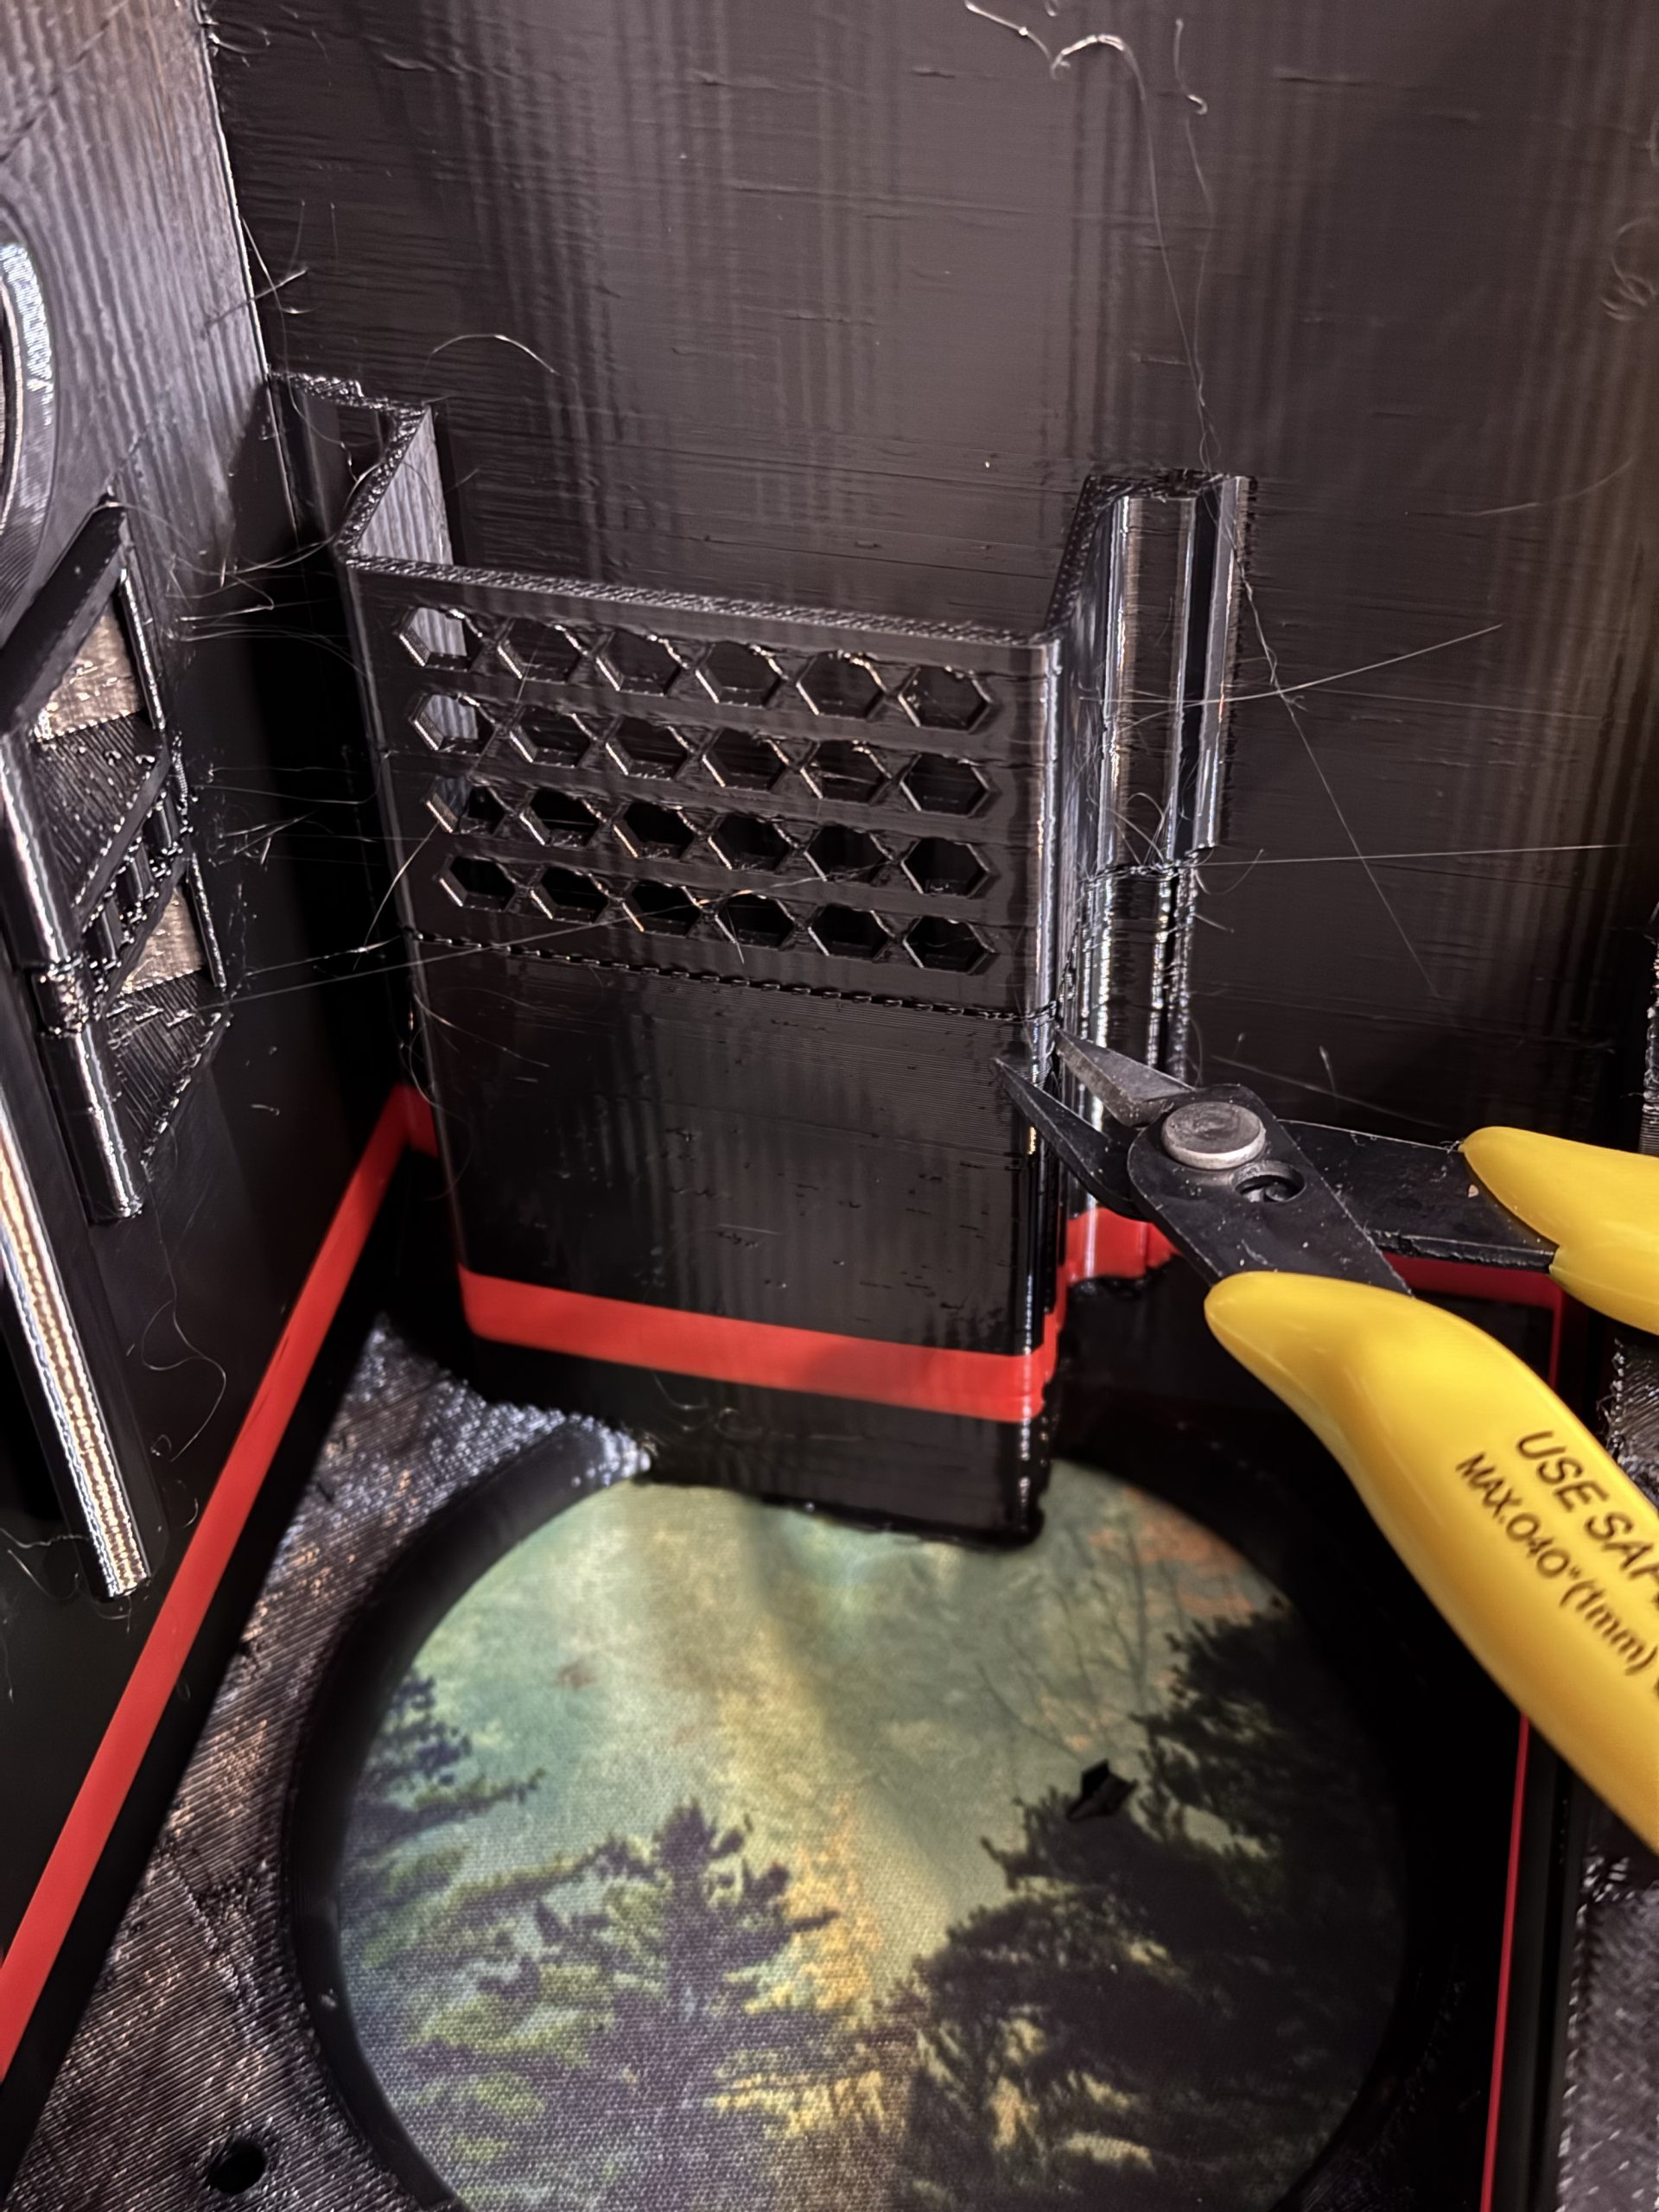
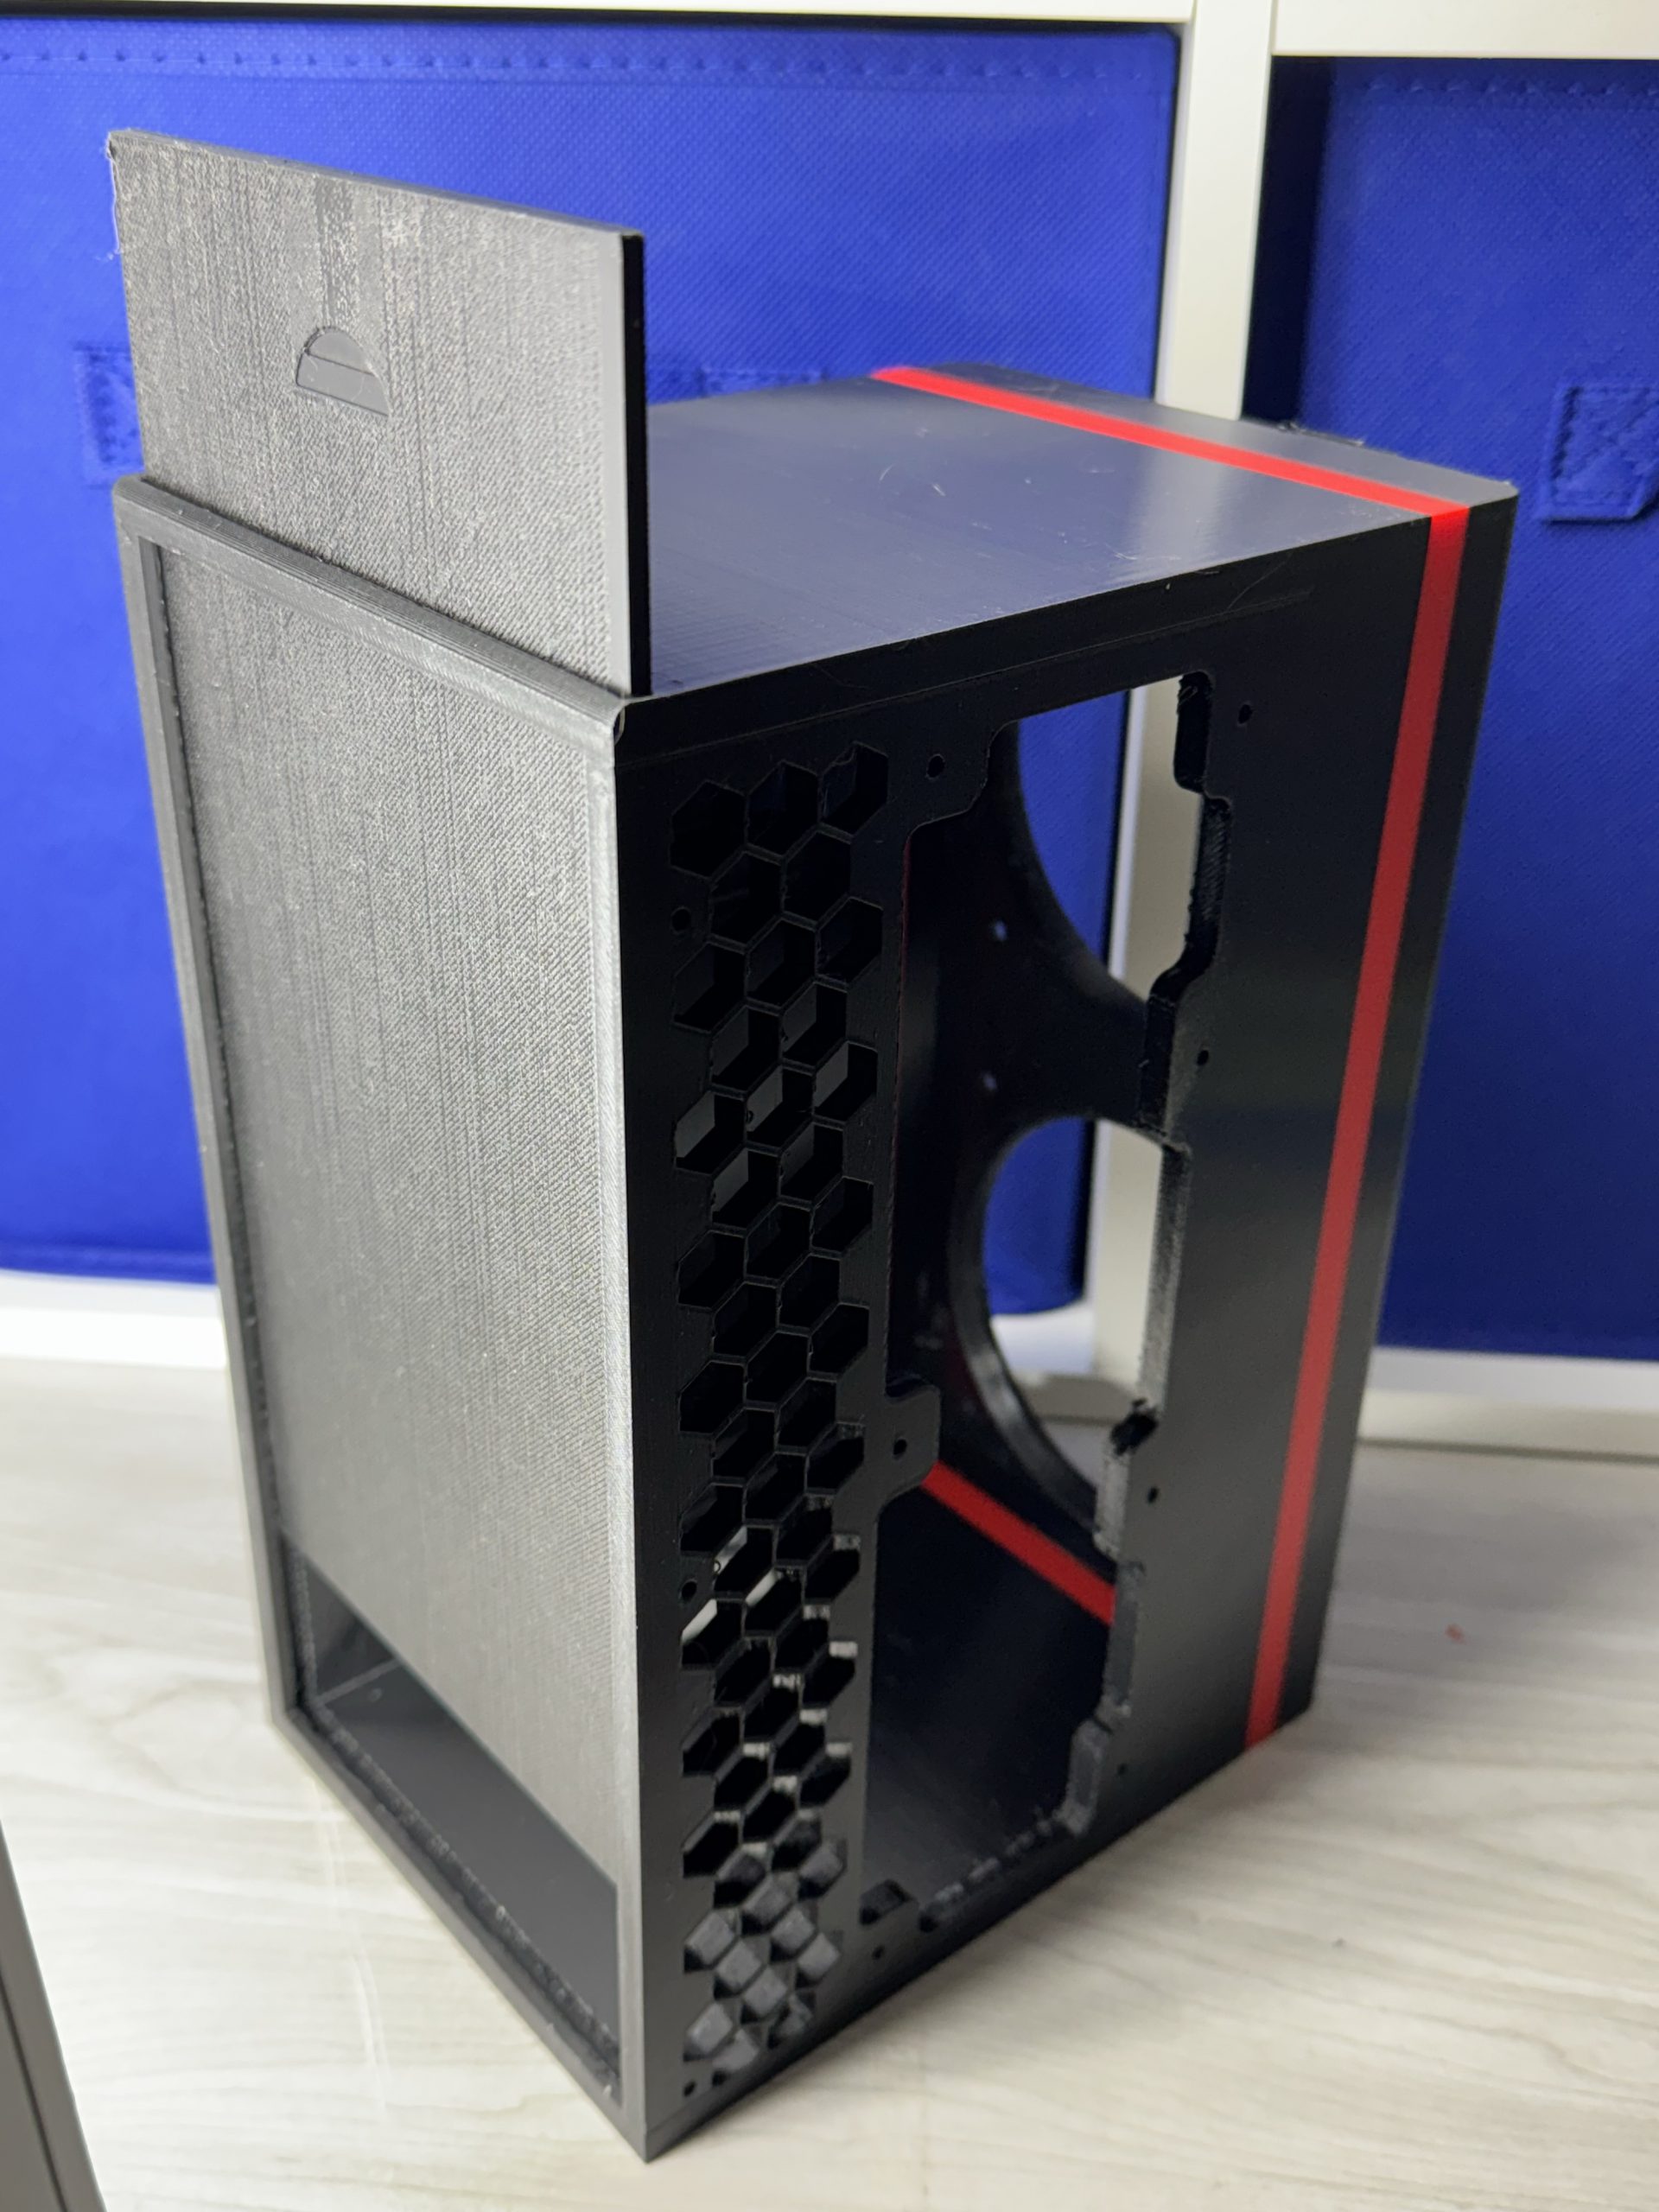
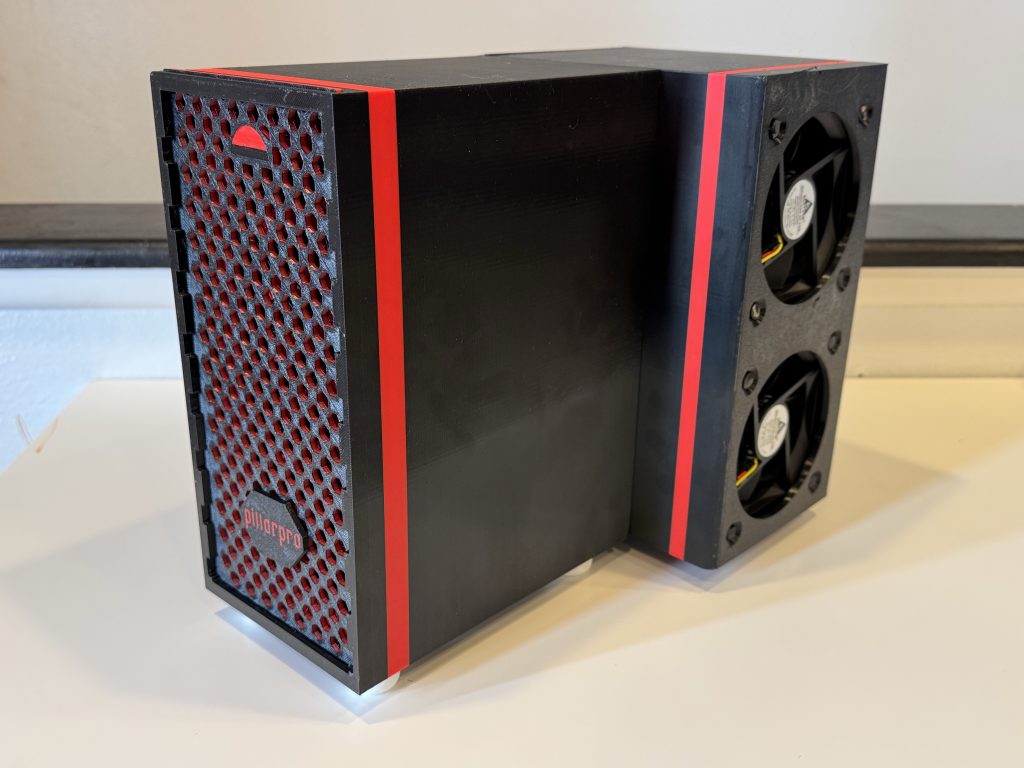
PillarPro is broken down into only 2 main pieces (and their doors): The hard drive chamber, and, the Power & Fan Chamber. The ‘garage doors’ for each side are different for a reason; We want the airflow coming in across all the hard drives, as this dense of a machine is best suited for negative air pressure.
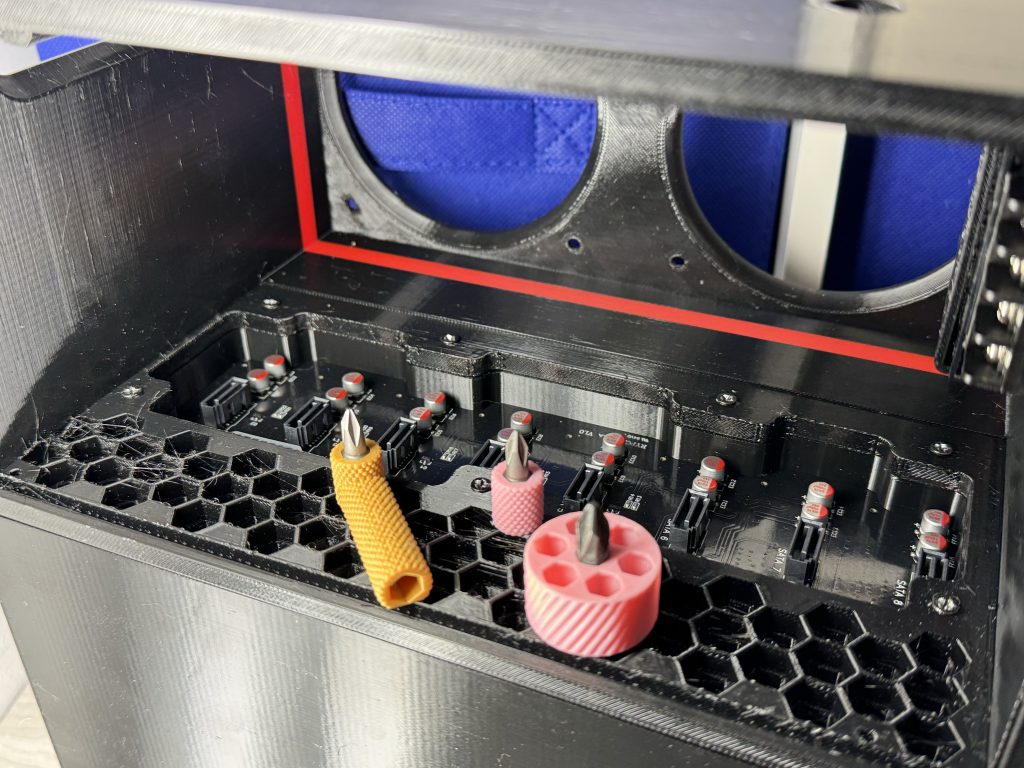
Finding yourself some little screwdrivers to print out will prove useful if all you have is standard size stuff.
If you already own stubbier screwdrivers, you’re likely set.


As you can see, the brains are covered in a nice cabinet in the back (the power chamber).
The front garage lifted, you’ll find storage for 8 hard drives. I’ve included a simple adapter for SSDs if you’re planning on some faster drives.
On the back, we’ve also got a barrel connector (for our 12V 10A power adapter), and 2 keystone ports to put whatever you want (in this case, two ethernet ports). After the pictures, I edited the file to have 5 keystone jacks. You can put HDMI, RJ45 (ethernet), USB A, USB C… your choice!
And the logo rotates if you want it to be horizontal. 🙂
But what about the inside?
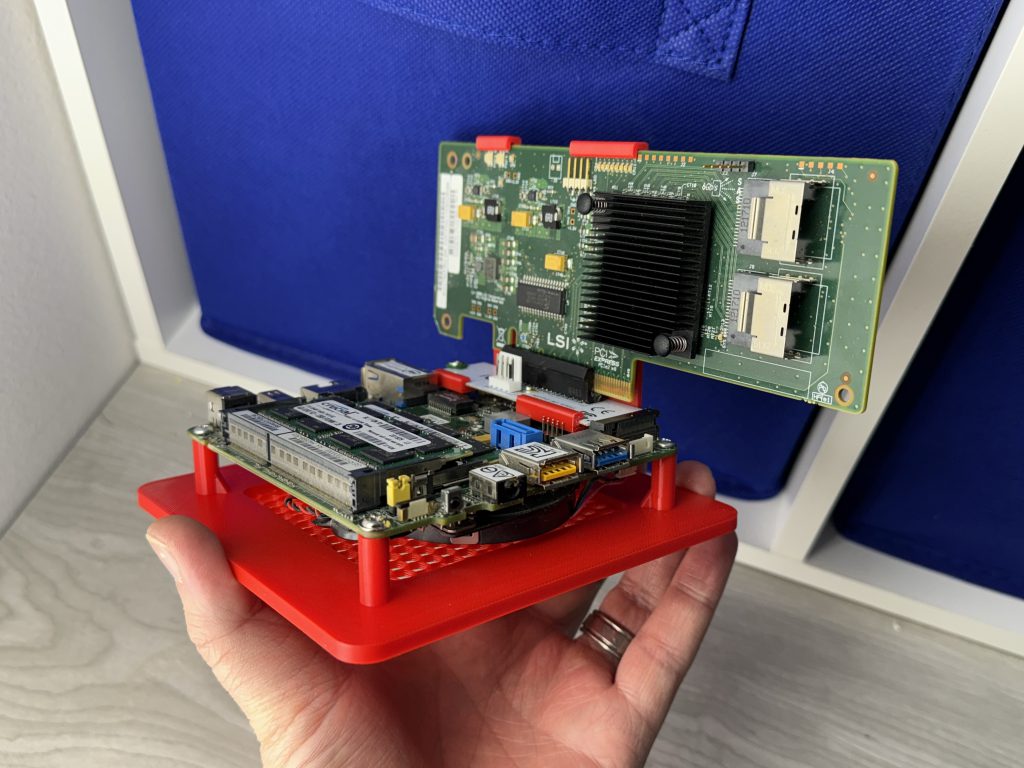
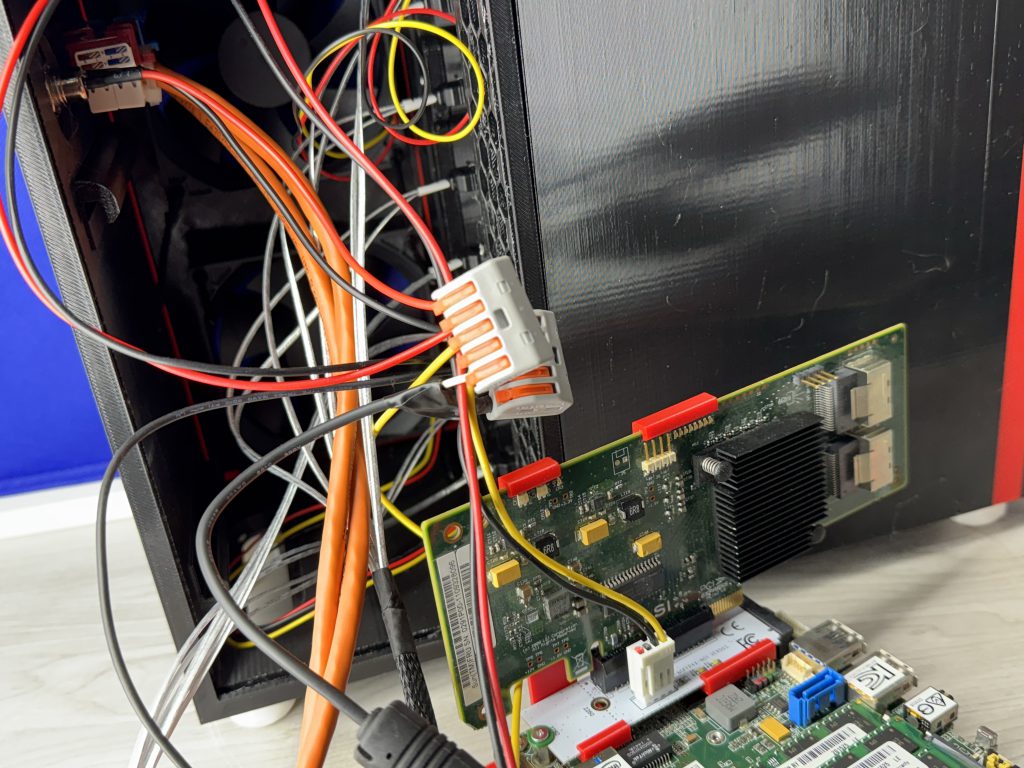
The inside consists of two main components: The backplane, and, your mini pc of choice.
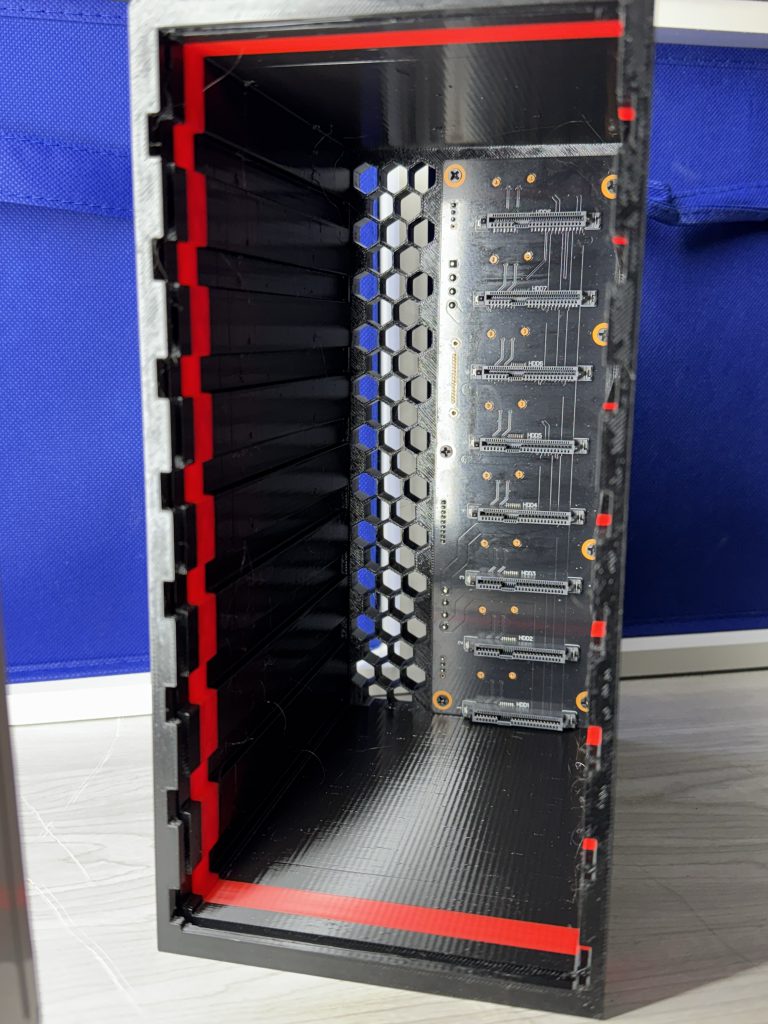
In the back of the hard drive chamber, you’re going to find the $20 8-bay backplane.
A backplane is an easy way to plug a bunch of hard drives in, and wont require you running Sata power to every drive individually. (There’s two molex instead; More on that later).
Shortly after creating pillarmini, it quickly became apparent that we needed a more universal approach to which Mini PC’s could be used. We want it to basically be any mini PC 5″ x 5″ or smaller. (Sorry Lenovo. Just wait a little longer for your not-quite-mini-enough PCs!)
The used market for these is gigantic. The board I have pictured here is the Intel NUC 5i5RYx (there’s a few). I’ve found it as low as $35.
I’d personally go 6th gen and newer, since 5th gen stuff in many brands (Brix, Asus, Intel) was the first rodeo with M.2 ports, and was often PCIE 3.0 x2 instead of x4. But… enough nerd talk.

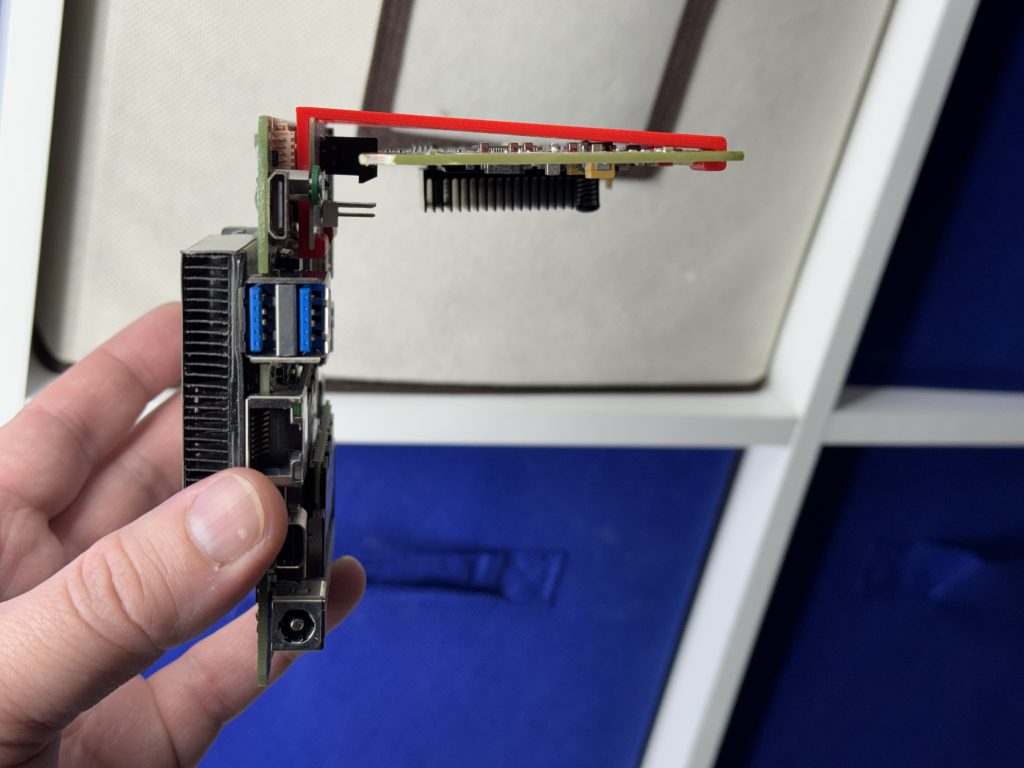
And no, your eyes do not deceive you. This is a custom M.2 2280 bracket adapter for all low profile cards (did you know they had a standard height? Makes sense I guess… xD)
This way, it is self-supporting, and doesn’t need to be screwed down to the chassis walls; Your M.2 port could be anywhere on your mini PC, so this should take care of you despite your setup potentially being different.
One more view.
Ok, so… whats left?
So you’ve got the hard drive chamber with the 8-bay backplane. You’ve got the power chamber with your mini pc and whatever card you’re using to hook up a bunch of drives. Nice. We’re basically done!


You’ll also need 92mm fans (two of them) which are attached with one of our latest uploads: TPU Fan Screws. If you’re unfamiliar, you yank these through the hole of the chassis, through the fan holes, and then it stops. It sits tightly against your chassis with TPU between it and the chassis, blocking vibrations etc. Pretty neat.
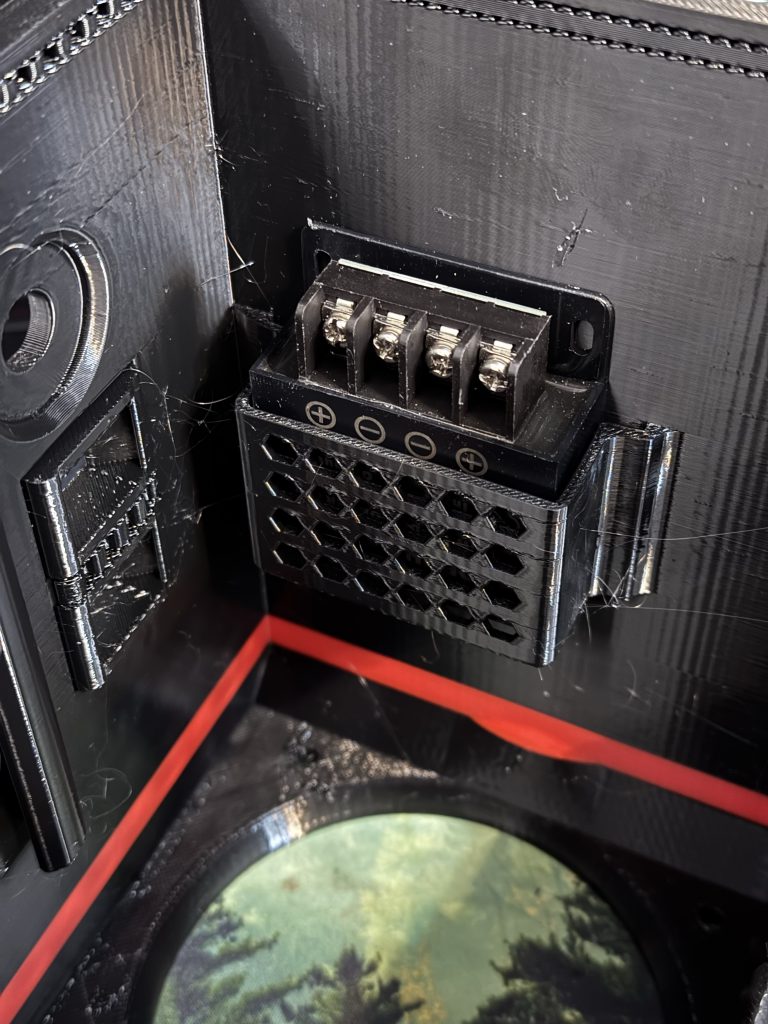
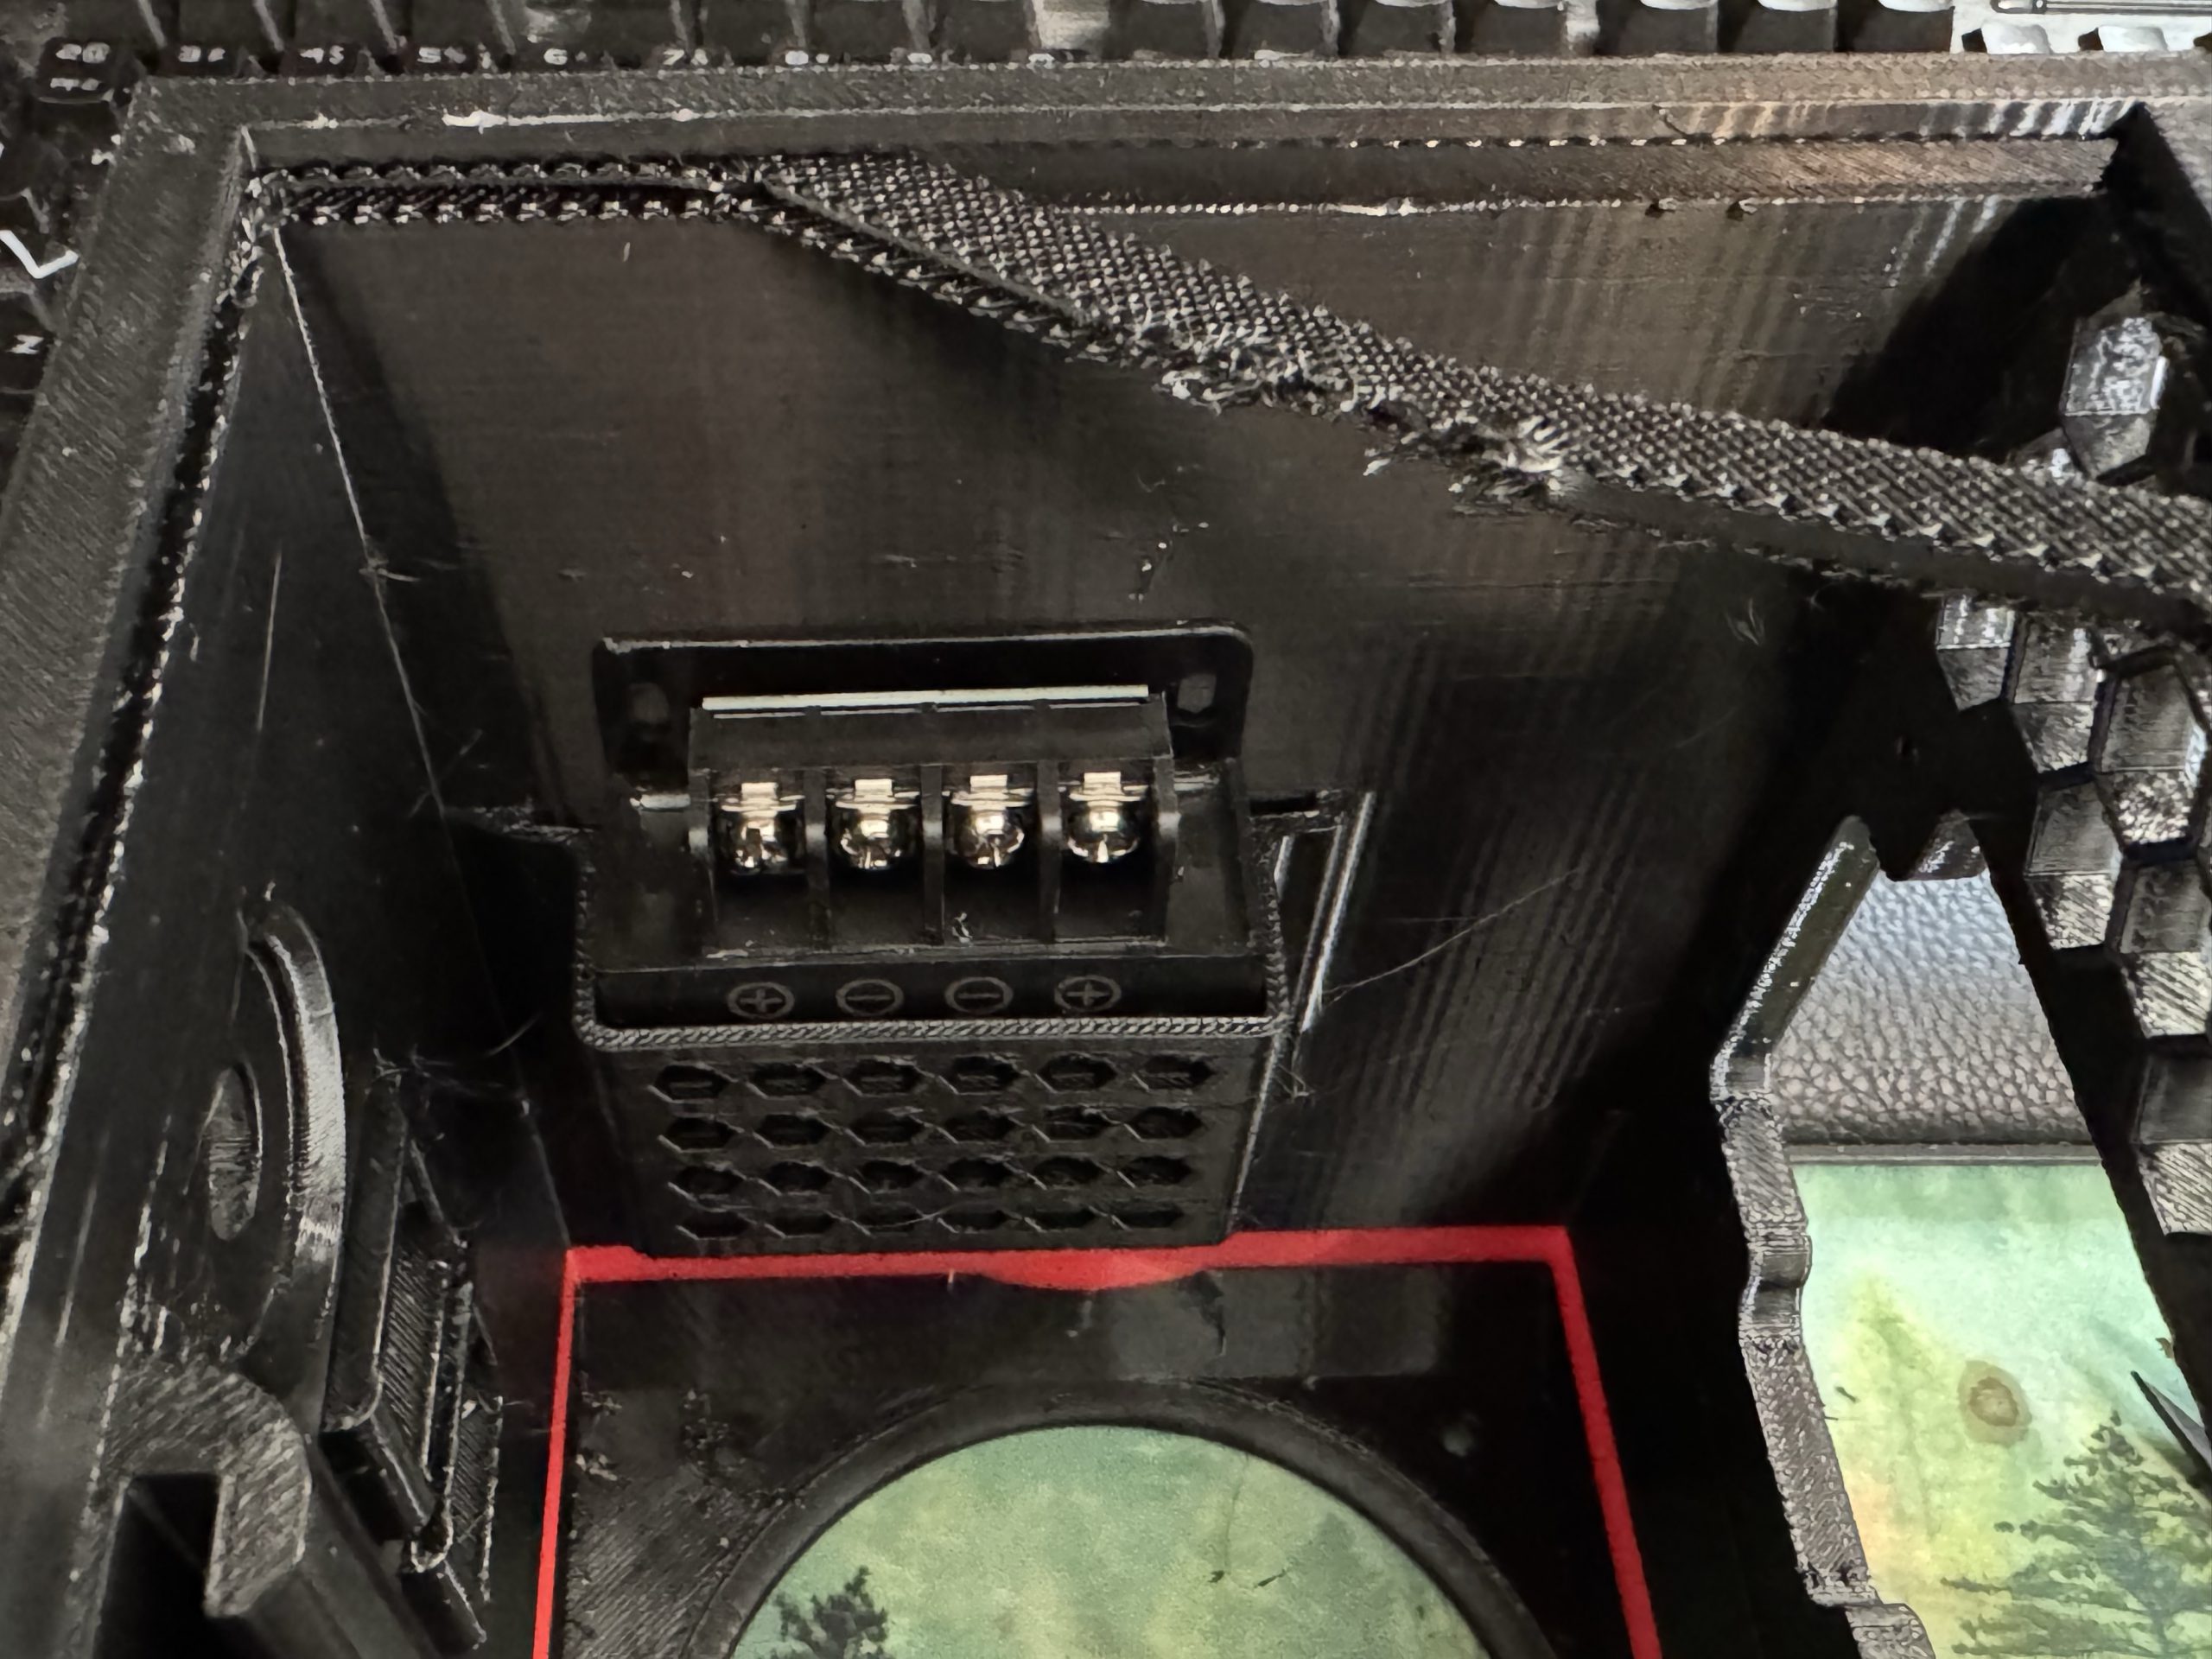
Here’s the power chamber prior to some of the cleanup (printing in PETG can cause… fuzz?) Anyway, your mini PC motherboard adapter slides into the left there. The power cord hole and keystone slots are on the left as well. At the top [and I’ve since relocated it to the bottom due to… reasons] you have a spot for the…
…12V to 5V down stepper.
What?
Yeah, so, almost the whole thing runs on 12V. However, in the case of hard drives, the little motherboard on the back of the hard drive (or PCB board) needs 5v to work. The platters spin with 12V. Soooo, we’ll need both. (Also, as far as I’m aware, all SSD’s run on strictly 5V).
More on that in the super-easy not-confusing electrical section (I’m serious, we’re gonna breeze through that – don’t worry).
Some 3D printing notes:
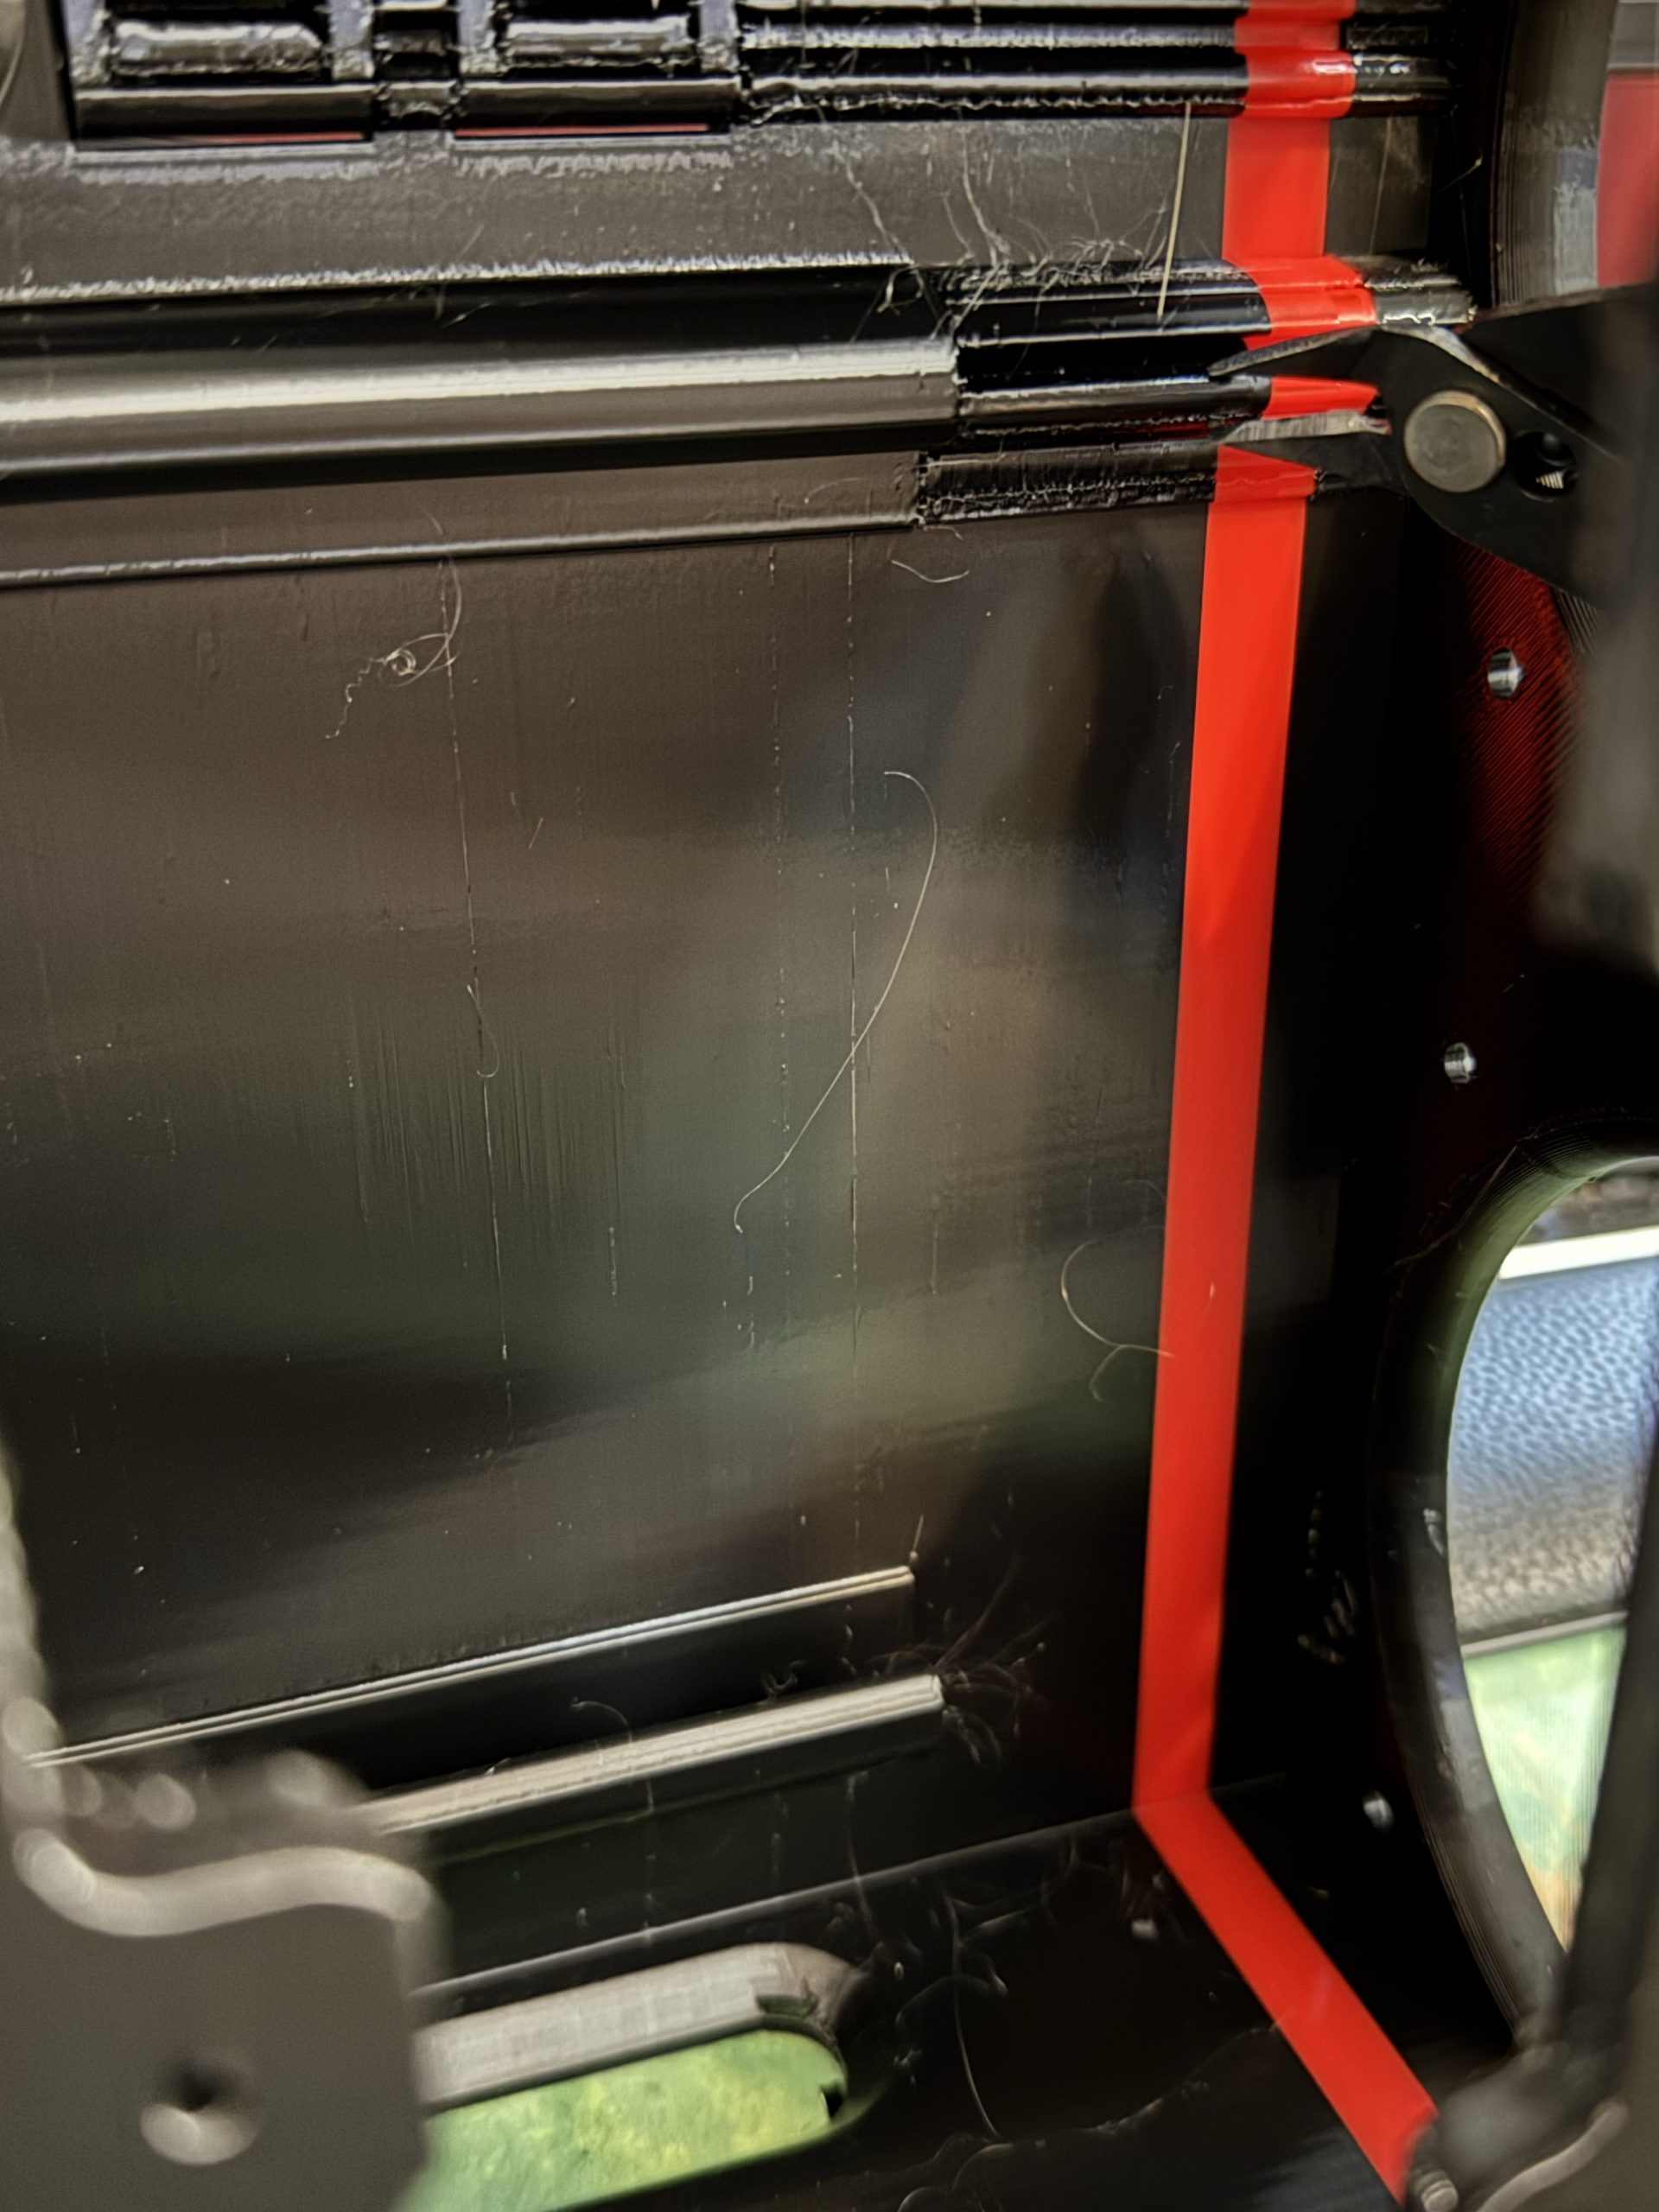
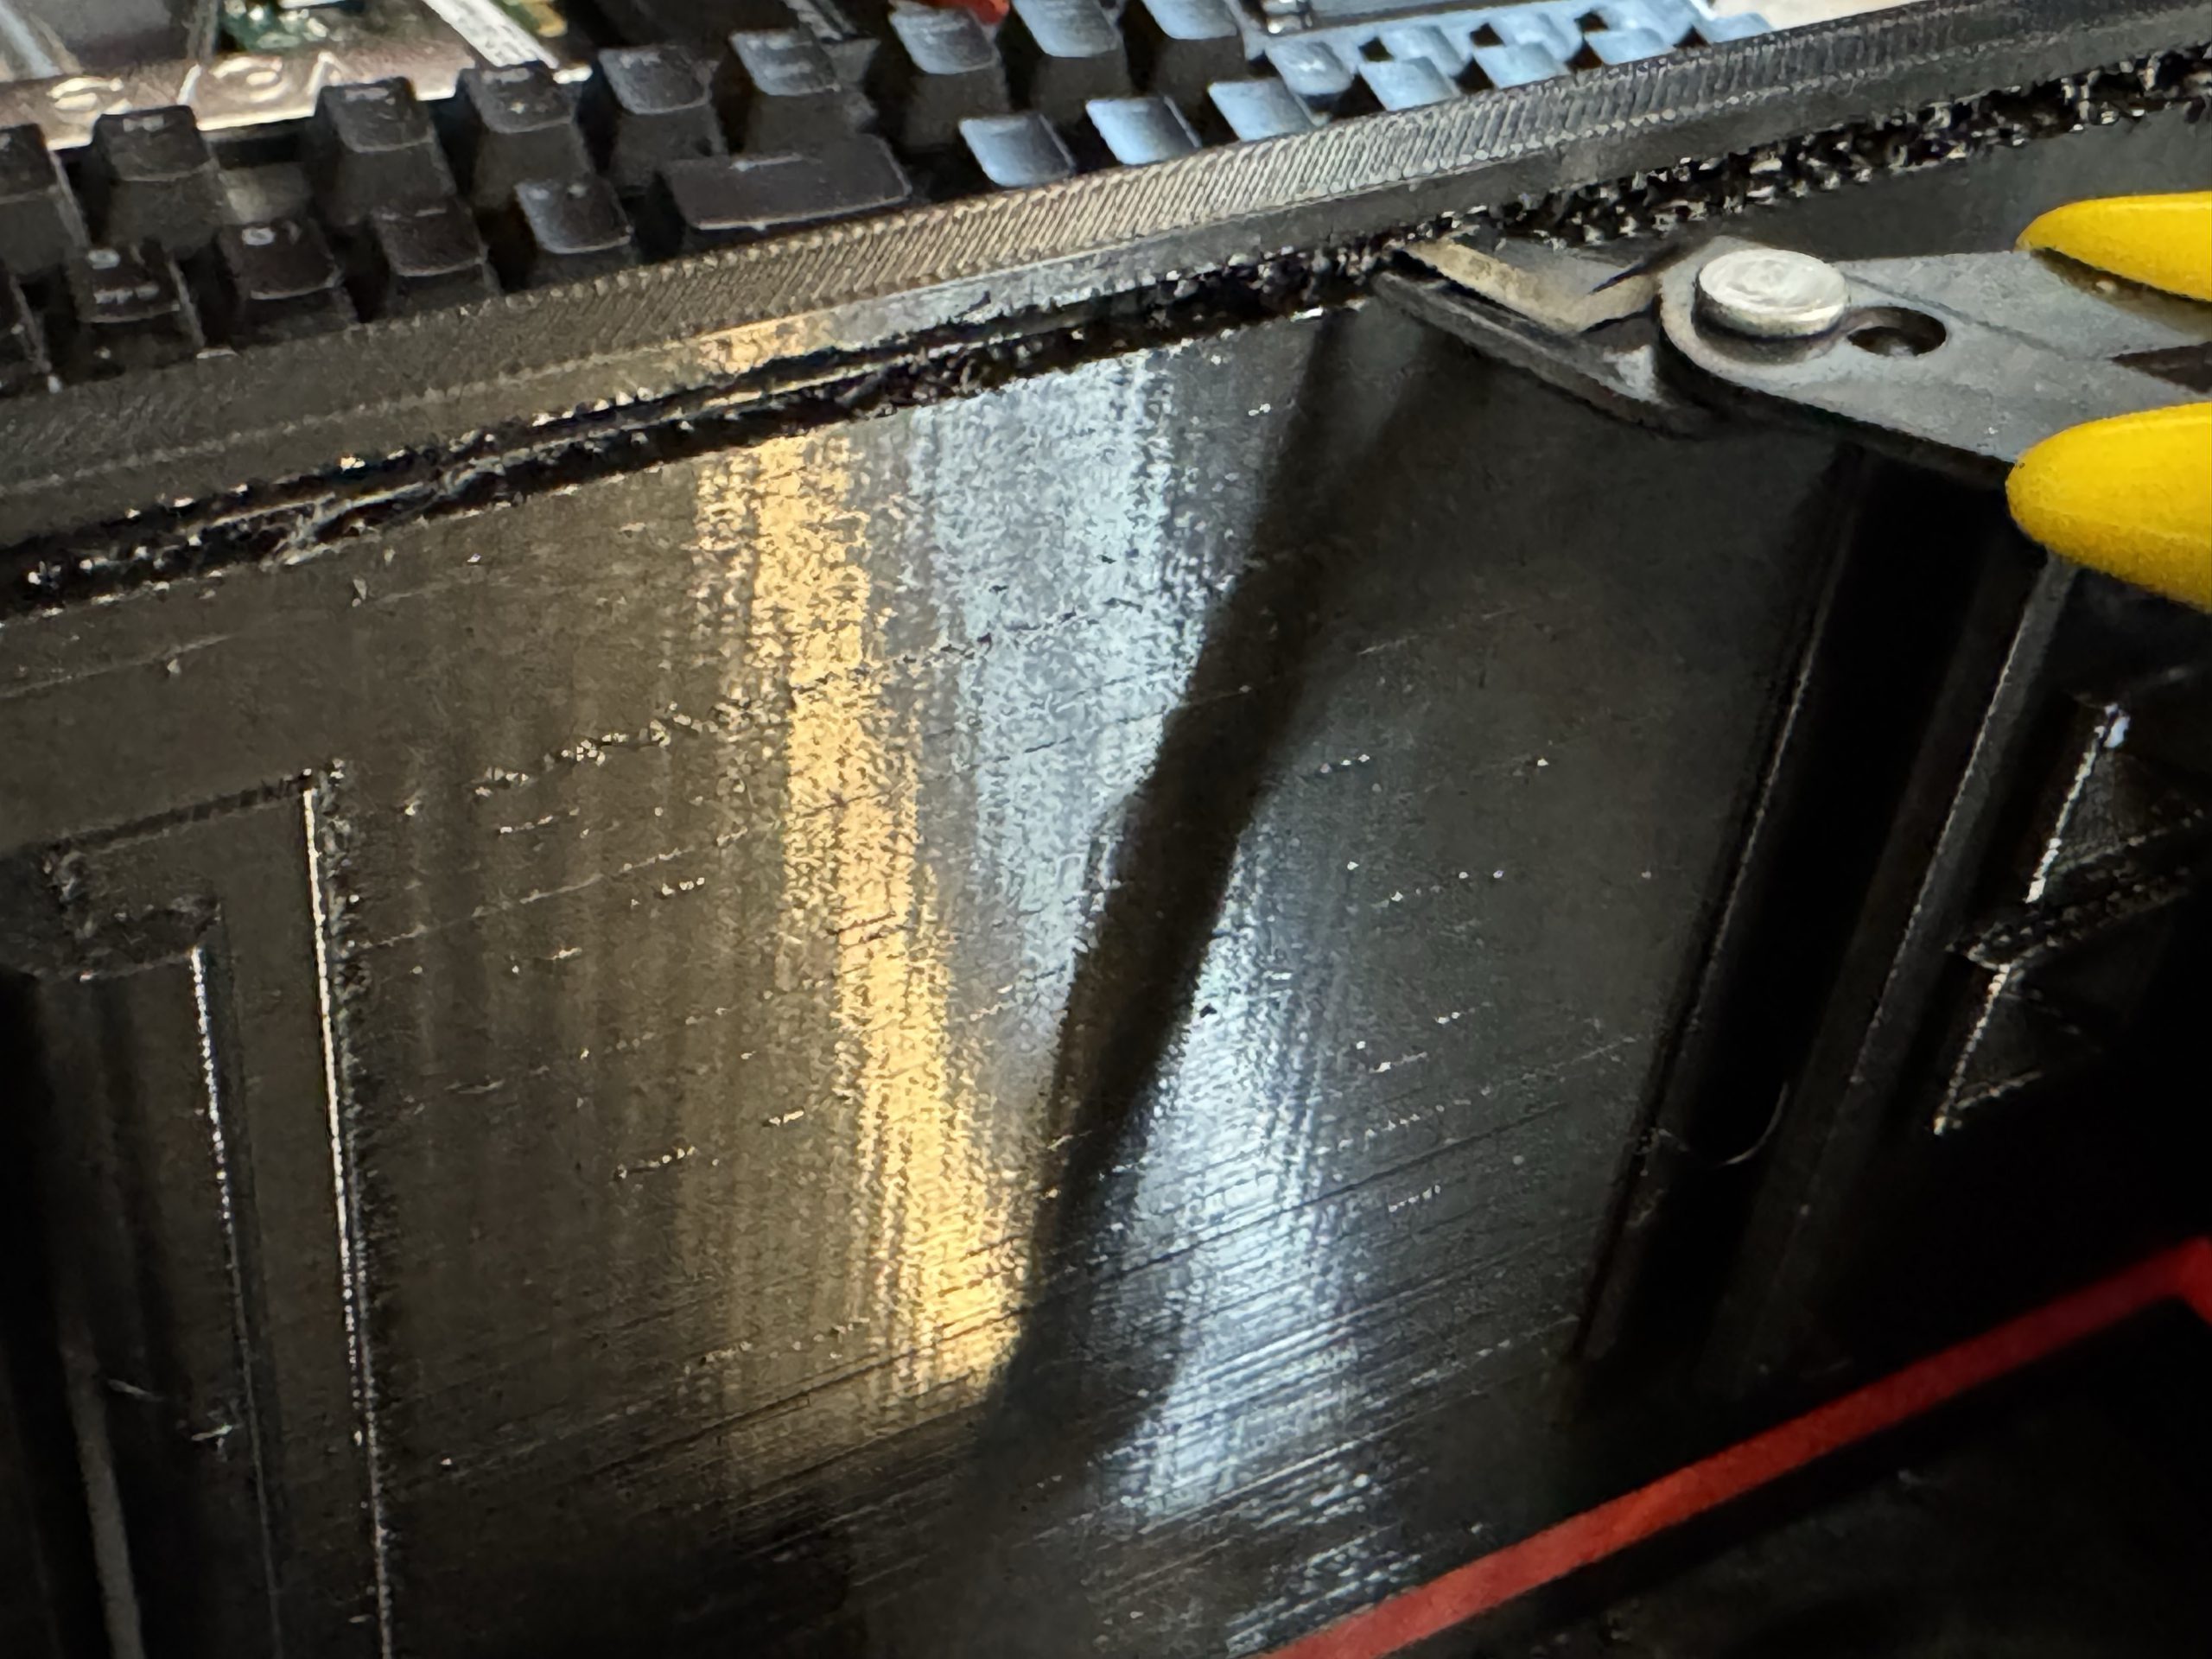
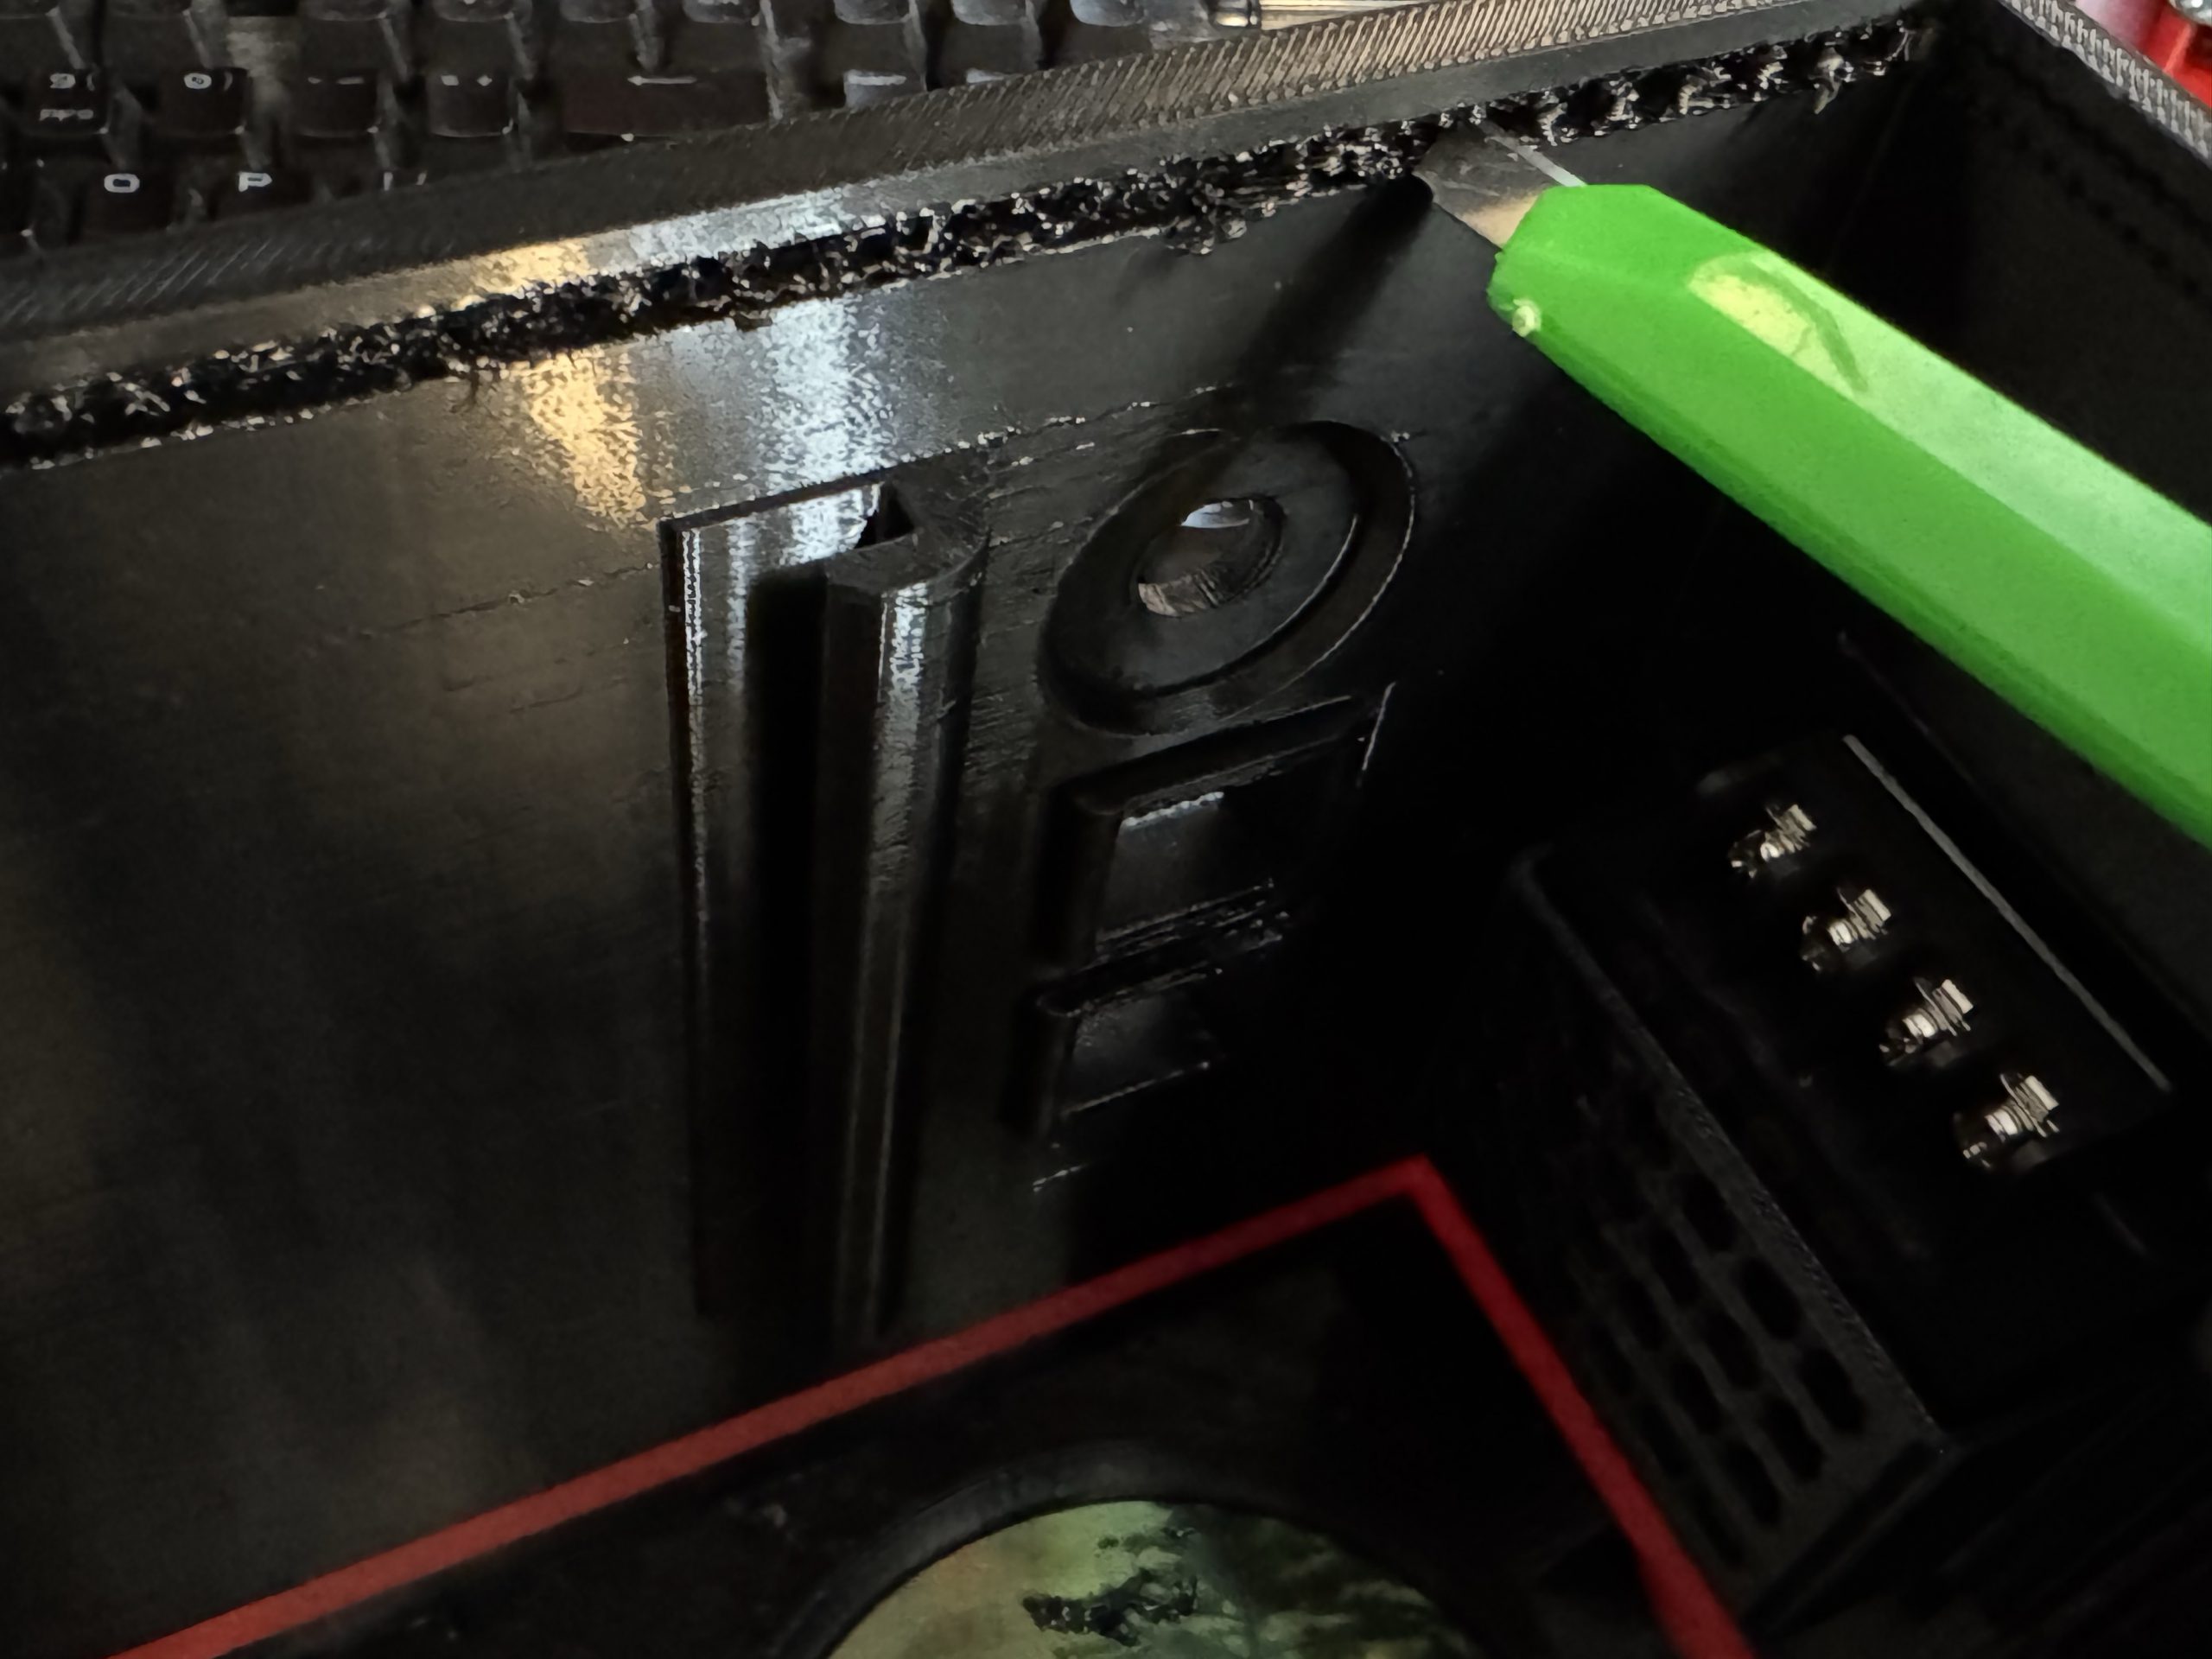
As the slideshow below shows, take your time when dealing with supports on the power chamber. 7/8 of them are simple to remove. I’ve made it as easy as possible. Your work will be rewarded with the slider door opening and closing with ease.
Last 3D printing note that I’m really proud of:
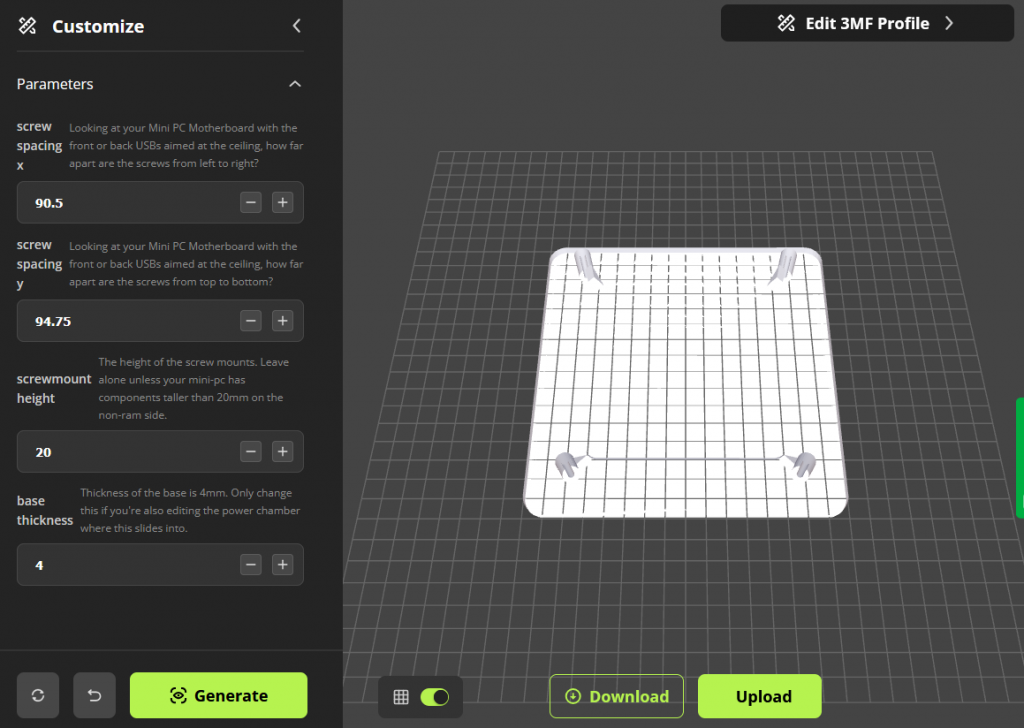
On makerworld, you’ll be able to customize the screw offsets for your mini pc right on the website! Name it properly with the mini pc you’re using so that others can utilize in the future easily! 😀
Plugging it all in.
Don’t give me that look. I’m telling you, this is totally gonna be easy. Go get your wire strippers and lever lock nuts. We’ll do this the fisher-price way!

Firstly, screw the two chambers together with m3 screws (sidenote, if you have a hoard of PC screws… those are likely m3 – just make sure they’re long enough). You’re… using the same screw holes that you used to screw in the backplane (oh yeah, do that too; m3, small is fine). So, just make the ones in the power chamber short enough that you don’t run into those screws on the other side. 🙂
Install your fans with the pull-through TPU mounts.
Install your 5V downstepper. (It’s pressure fit, and if not, give it more pressure like a parent watching over their kid doing homework)
Install your barrel jack connector.
Still with me?
Plug your fans into the backplane. (I know, it has the 3-pin fan headers built in, cool right?)
Plug your ethernet keystone couplers in. Plug some 12 inch ethernet in or something to reach your mini-pc. (I terminated and ran mine, do not recommend in-wall stiff-as-heck cables in here, haha)
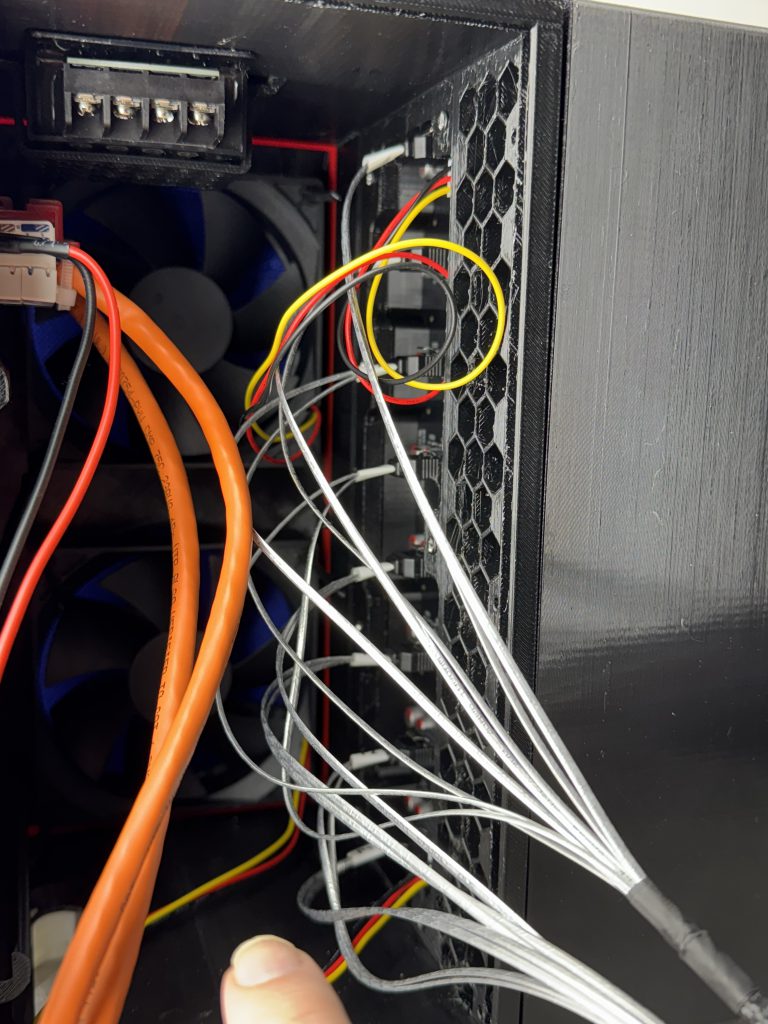
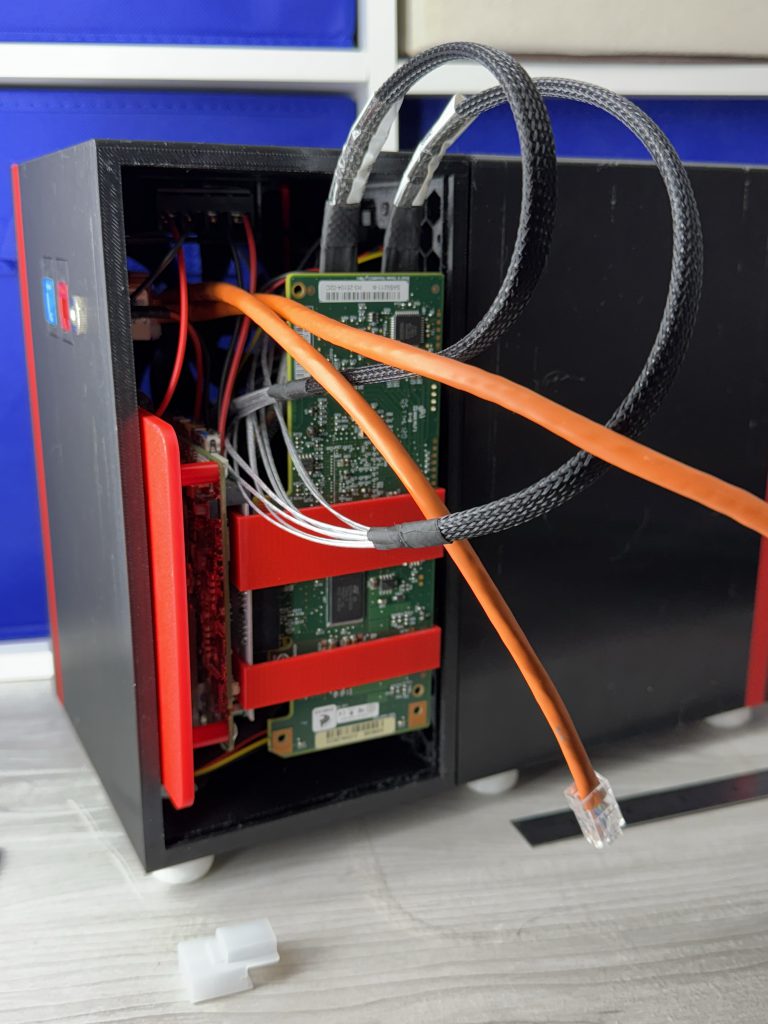
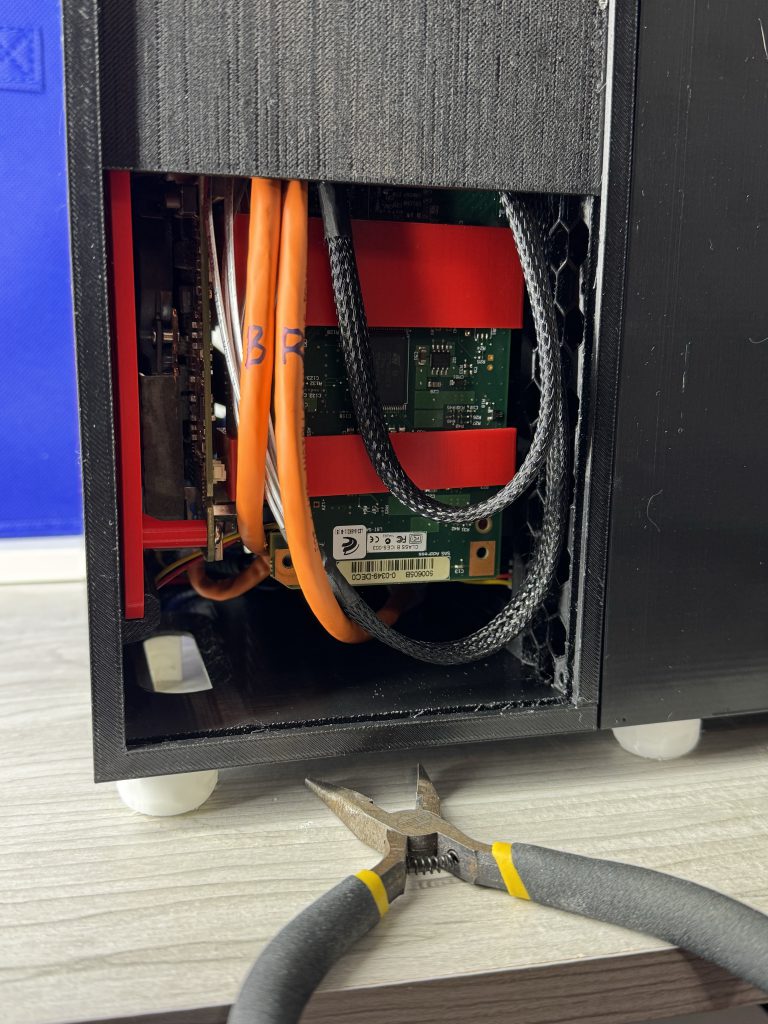
Plug in all your drives with your Mini SAS to SATA breakout cables you bought from 10gtek or wherever.
I know. The picture makes it look crazy. Just follow the sound of my voice through the bolded text…
Just plug it all in.
The end.
…
Nah, I kid. Have you been to one of those tutorials before? Gotten to step 47 and then they’re like “and that’s pretty much it!” and abandon you halfway down a forum post? XD
Well, look, this part is super easy, but instead of this purposefully horrific picture, lets use a simple diagram to bring our collective heart rates all down. (You’re still grabbing your armrests or phone tightly after that ‘plug it all in statement’, I can see it in the pulsing vessel on your left temple).
If electricity scares the crap out of you, watch 30 seconds of this, from where I’ve started you (around the 28 second mark through 1 min). I’m serious. This will make the below diagram even easier.
Lets look at the 5v needs first.
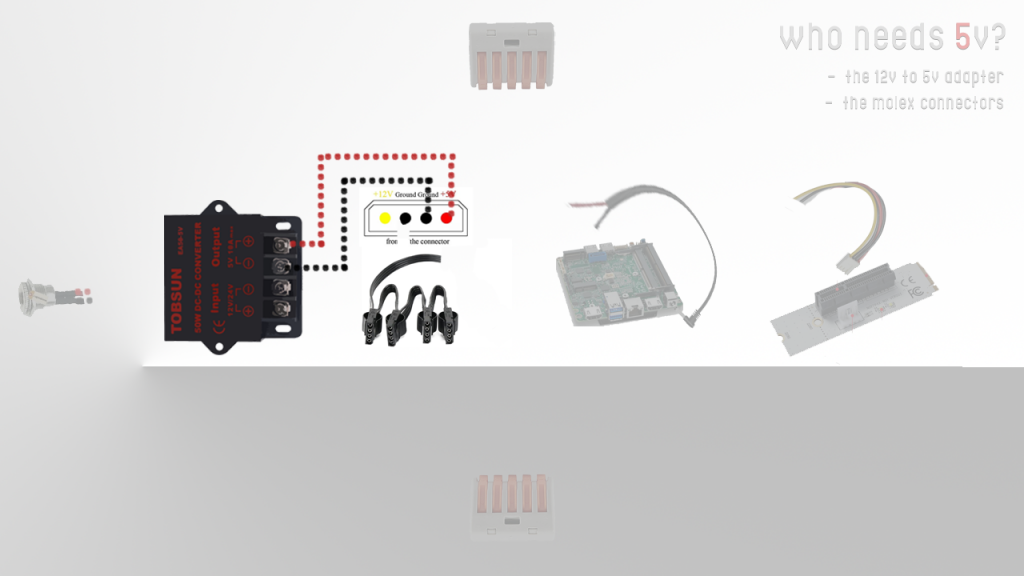
See? That wasn’t so bad. Just use some wires (18awg or 16awg is fine; That’s awg as in ‘gauge’ or wire thickness. Smaller number means bigger wire. Don’t ask) and hook up the positive and negative wires to your snipped molex PSU adapter (the modular “psu” 4 pin side has been snipped). Follow the wire based on the diagram to ensure you have the 5v lines.
Ok, 12v is next. Just 4 things need it.
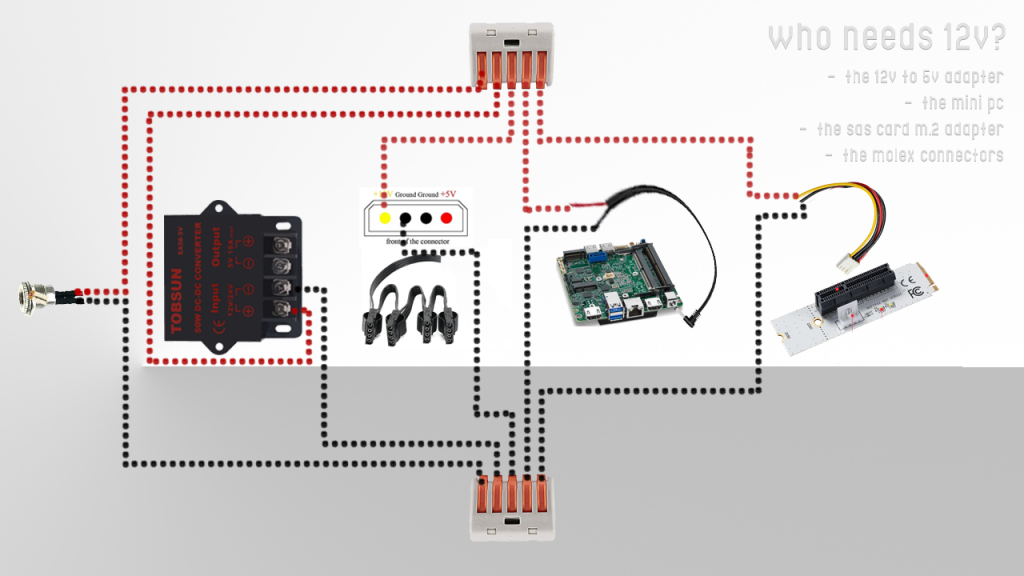
See? That’s not so bad. Use 5-pole lever lock nuts (these clamp-down fisher-price electricity-for-babies items at the top and bottom) to easily spread your 12v load all over ????.
Remember to plug in your molex to the molex ports on the backplane (don’t worry about the SATA port), and your short barrel adapter to your mini pc.
Always double-check your + and – to ensure polarity is correct.
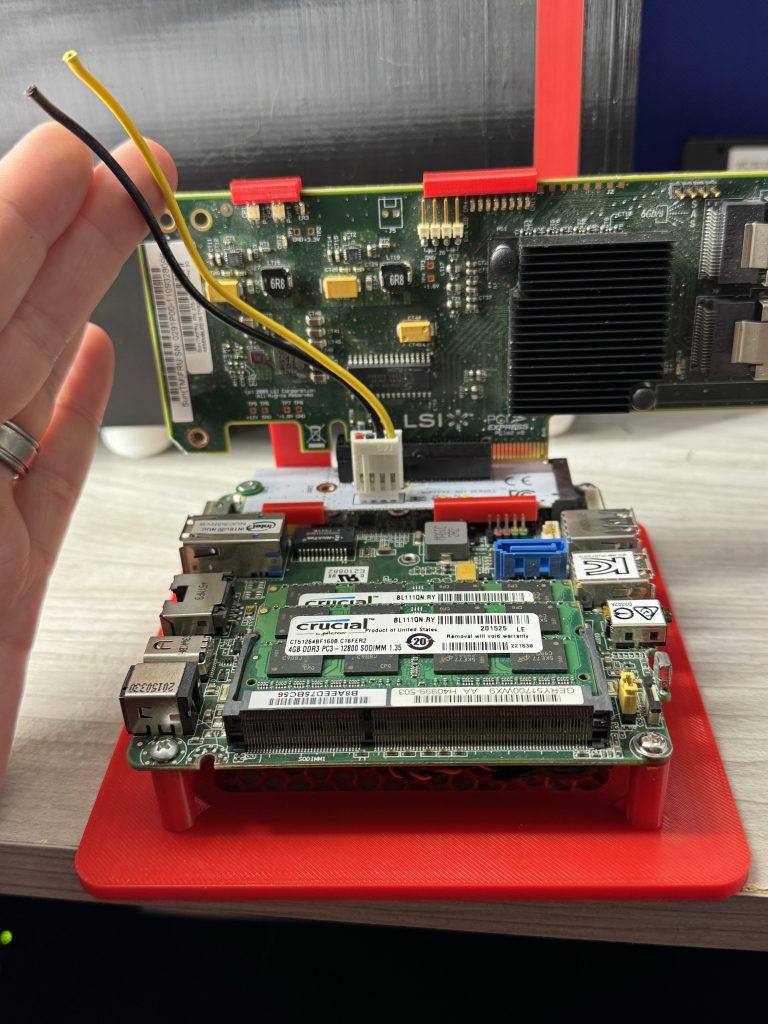
We do NOT use the 5V on the m.2 adapter cable, so, feel free to snip that off, as I have here.
You’re left with yellow (12+) and black (12-).
At this stage, its time to test! Plug in any jump drives that you may need to run the bootloader of your choice (unraid, xpenology, truenas, etc).
Also a good time to plug in any keystone jack equipment, temporary wireless keyboards, etc before you go headless.
OH! And now is a good time to change your BIOS to power on always after power failure. This will make it so the machine boots when you plug the barrel connector into the back.

The mini SAS cables can be bent softly to make the u-turn proper.
I labeled my ethernet cables the color of the jack on the back. You could also use L and R for left and right.
I have one plugged into the native 1G ethernet on the mini pc, and the other into a Wavlink USB to 5Gbe network adapter. The wavlink uses the popular RTL8156 chipset, which is compatible natively on OSes like Xpenology, Unraid, Truenas, etc.
Pretty fun to have 5Gbe on a 10+ year old mini pc.
Slide the garage door down completely, and you’re ready to go!
I didn’t put a grill on my fans, but there’s nothing stopping you from doing so. Be sure to test spinning your fans with your fingers at this stage, and use a small utensil to push cables away in the event that they touch.
The idle and load numbers are placeholders. I’m certain the load number will be higher. I was testing with all SSDs, so, I’ll have numbers up as soon as I get a slew of drives.
Purchase List.
Maybe you already have some of this?
| Description | URL | Qty | Unit price | Total price | ||
| 5.5 x 2.5 MM DC Power Jack Socket (Male + Female) | Link | 1 | $8.99 | $8.99 | ||
| Ethernet RJ45 CAT6 Keystone Couplers | Link | 1 | $6.99 | $6.99 | ||
| 12V/24V to 5V 15A Step Down Converter | Link | 1 | $10.00 | $10.00 | ||
| SAS to SATA Breakout Cable | Link | 2 | $8.00 | $16.00 | ||
| PCI-E 4X to M.2 NGFF Adapter Card | Link | 1 | $8.99 | $8.99 | ||
| 92mm Fans (two pack) | Link | 1 | $11.99 | $11.99 | ||
| Low profile SAS Card (IT Mode) Supporting 8 drives | Link | 1 | $30.00 | $30.00 | ||
| NUC5i3RYH / NUC5i3RYK / NUC5i5ryh / NUC5i5ryk MiniPC | Link | 1 | $50.00 | $50.00 | ||
| A variety pack of M3 screws | Link | 1 | $8.99 | $8.99 | ||
| Jonsnobo 8-bay Backplane for Hard drives | Link | 1 | $20.00 | $20.00 | ||
| Multi Molex Adapter (for powering Jonsnobo backplane) | Link | 1 | $9.99 | $9.99 | ||
| 1 Foot Ethernet Cables | Link | 1 | $8.39 | $8.39 | ||
| 12V 10A External Power Brick | Link | 1 | $17.99 | $17.99 | ||
| 1 to 5 Wire Nuts Connectors | Link | 1 | $8.98 | $8.98 | ||
| $0.00 | ||||||
| Notes: | Subtotal | $217.30 | ||||
| – Drives are also required. (duh) | Adjustments | $0.00 | ||||
| $217.30 | ||||||
It breaks $200. Dag nabbit. Frick. I’m sorry. -_- I hope you have some of this already. It heavily assumes you have nothing.
Bonus: The accessories.
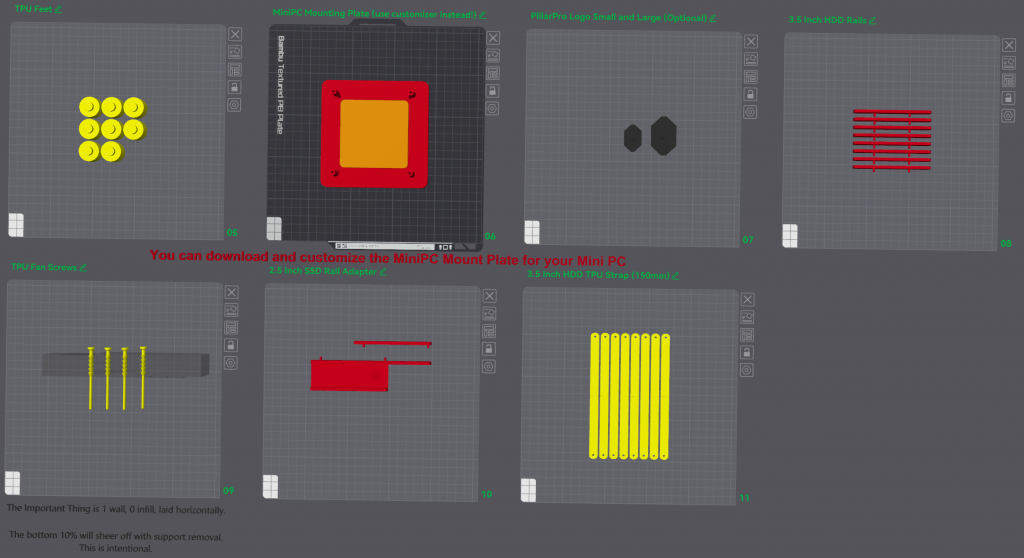
I almost forgot all the other crap! There’s TPU (yellow) feet, and TPU handles for your hard drives to get them out easily. (I didn’t show too many in the images above because… I don’t have extra 3.5″ hard drives laying around). There’s also the logo (which you can customize should you choose), SSD adapters, and 3.5″ hard drive sled guides for connecting proper. 😀
Please. Enjoy!
And watch out next month for other news…

This is amazing. Thank you for creating these! Do you have recommendations for TopTon motherboards to use?
What an awesome build
I am in the process of of building your 8 bay nas. I am looking at the instructions and noticed that your mini pc only has 1 M2.0 slot in it, as does mine, and I am wondering what are you storing the OS on if you no long have a M2.0 slot for a ssd?